You know what? I did it! I freakin’ did it!
Ladies & gentlemen, I successfully made profiteroles! You may have read about my failed attempt at making profiteroles and since, I had attempted two more times and failed :(
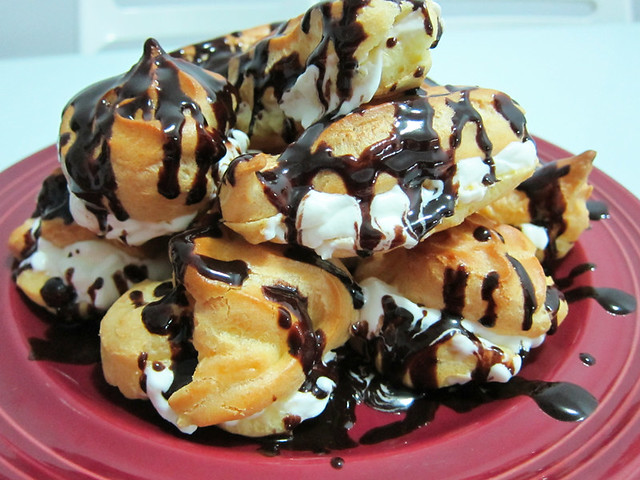
# – Crispy, creamy, chocolatey profiteroles. Woohoo!
However, last night, the time felt right. It was late, yes it was 12.30am in the morning and I thought to myself, “Hey Kimberly, I feel like some profiteroles and I have a feeling the choux pastry will puff up this time”. And so, I decided to make them, eventhough I was supposed to be already in bed.
And boy, did they puff! I was so overwhelmed with joy, I did a dance and screamed joy in my kitchen. The BF thought I had gone nuts, but then he too saw the puffed up pastry in the oven and subsequently joined in my awesome dance.
I think the success of this attempt had to do with me implementing a tip I had picked up from Masterchef Australia where the challenge in that particular episode was to make Croquembouche, a complex dessert that can be summarised as a tower of profiteroles bound together by caramel.
During the making of the choux pastry, the Masterchef’s voiceover was saying that the choux pastry of one of the contestants did not rise because she did not cook the flour thoroughly. So this time, I made sure I cooked the flour mixture through. You probably have no idea what I’m rambling about, so lets just go straight into the step by step :D
The ingredients:
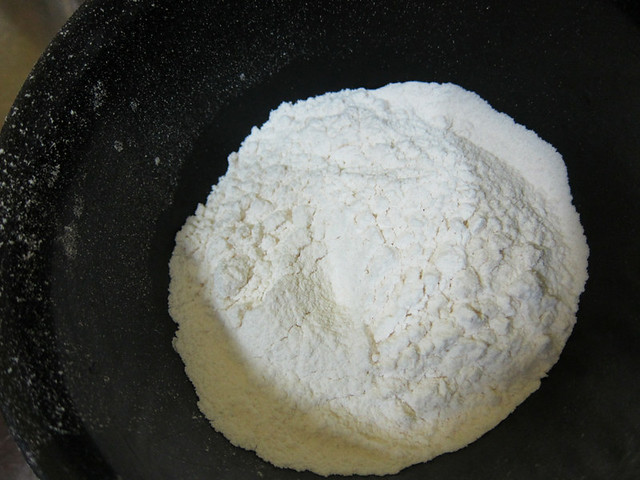
- 65 grams of flour, sifted twice
- A pinch of salt, sifted twice
- 150 ml of water
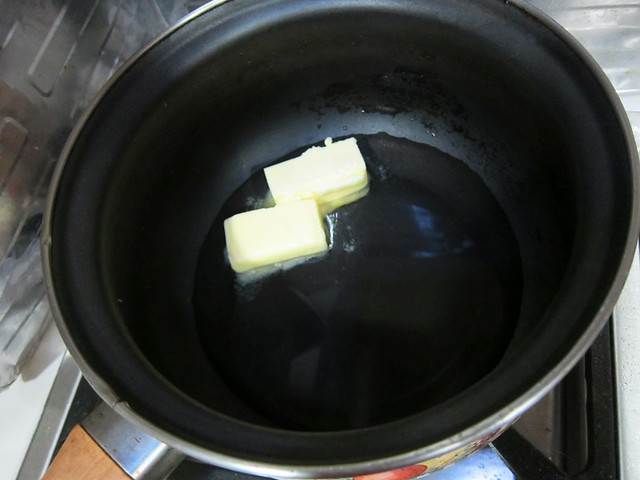
- 50 grams of butter
- 2 eggs, well beaten
For serving:
- 100 ml of whipping cream, whipped till double in size
- Chocolate sauce (you can buy or make yours but watch out for tomorrow’s post for my homemade version with rum!)
# – First of all, sift the flour and salt twice and set aside in a bowl.
# – Then melt the butter in water in a pot on low heat.
# – When butter have thoroughly melted, turn the heat up a little to get to a gentle boil. Most recipes would ask you to remove the butter mixture from heat at this point, but please don’t. Now, dump in the flour and salt mixture.
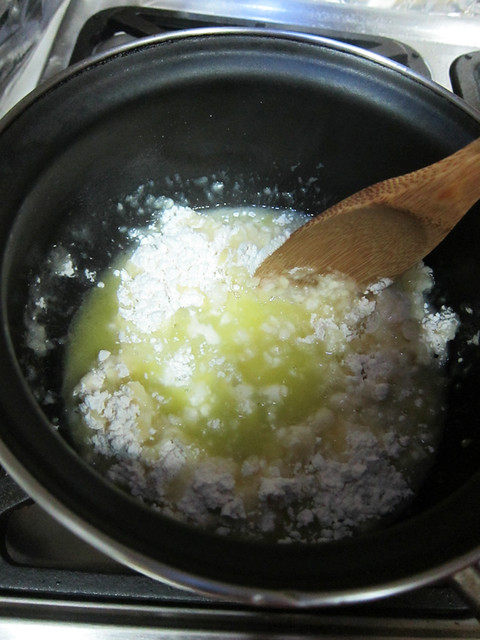
# – Turn the heat back down and stir and stir and stir and stir.
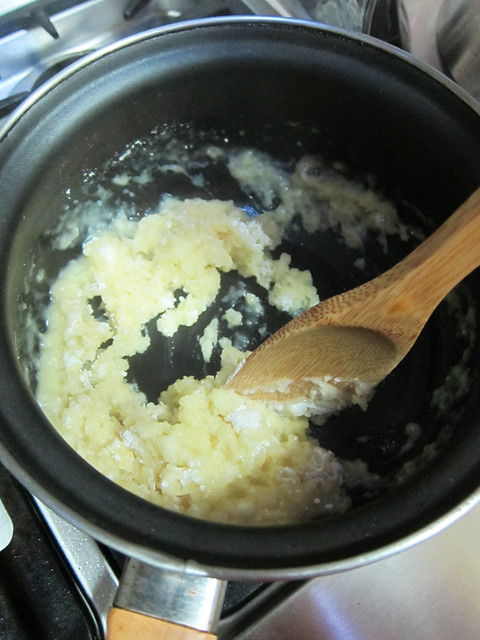
# – Stir till everything sticks together and forms a soft ball. Then continue stirring over the low heat for about 5 minutes more. Yes, this is the part about cooking the flour through I was talking about.
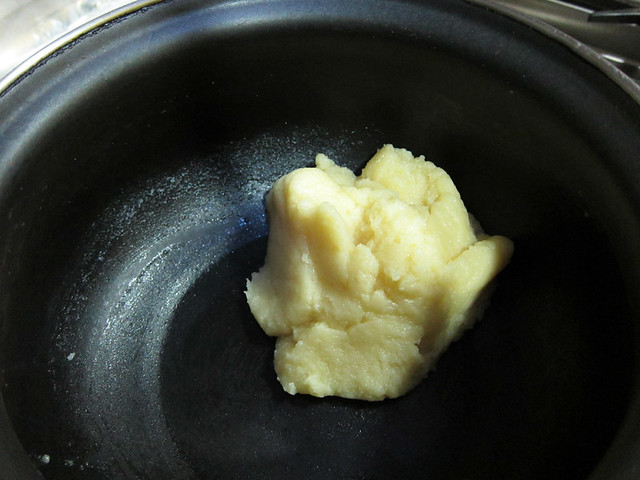
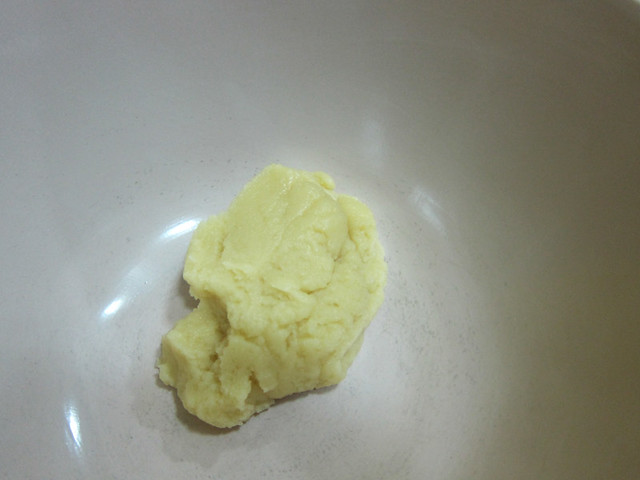
# – Now dump the dough into a mixing bowl to cool down for about 15 minutes.
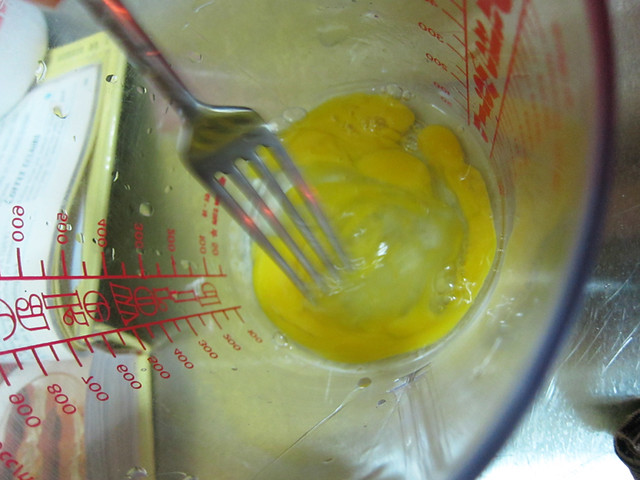
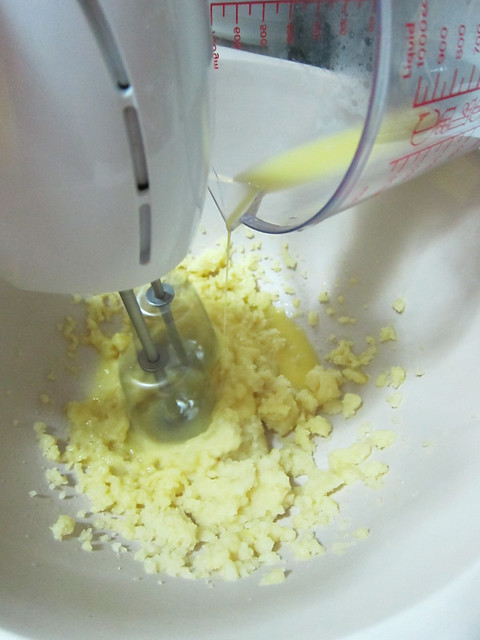
# – In a pitcher, beat 2 eggs well.
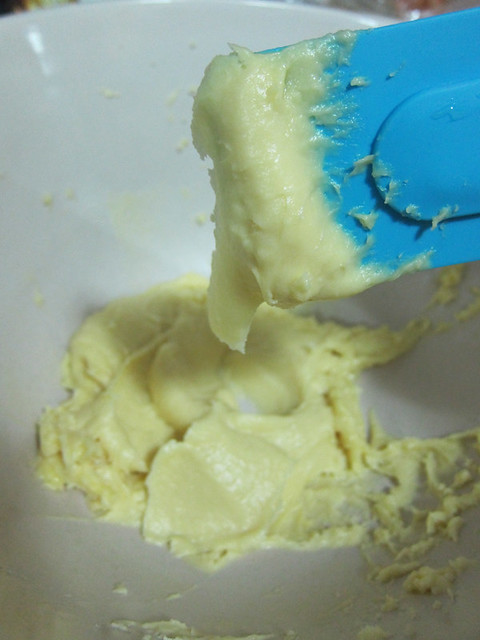
# – Gently pour the egg into the dough while you’re beating it with an electrical mixer. Beat till everything is combined and form a soft peak.
# – What’s a soft peak? This is soft peak, where the dough sticks to a spoon and very, very slowly droops downwards.
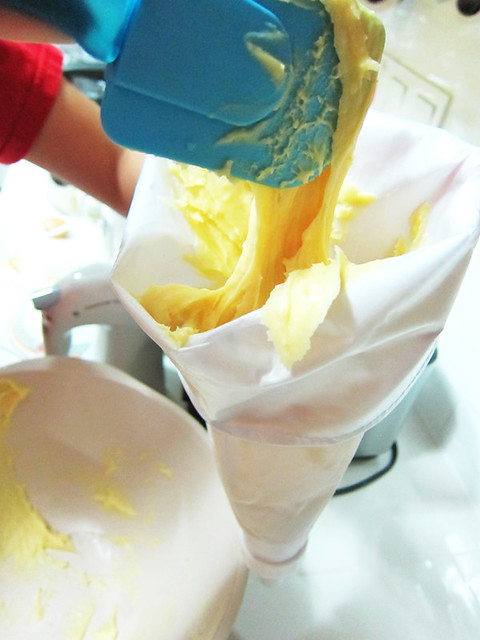
# – Now, stick the dough into a piping bag. Of course, you can use a makeshift piping bag with a freezer bag, just nip the corner off and voila!
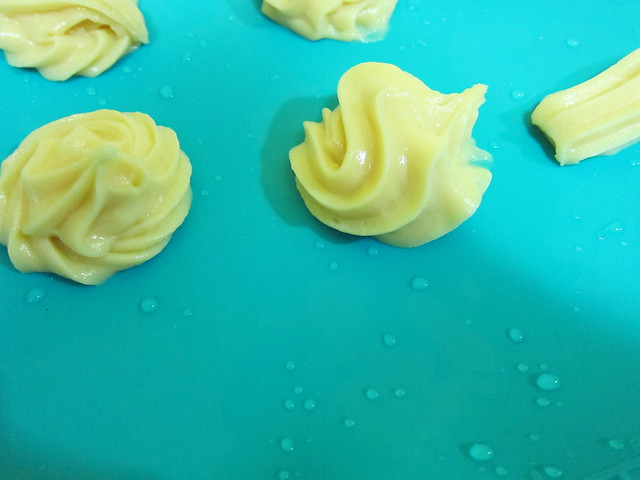
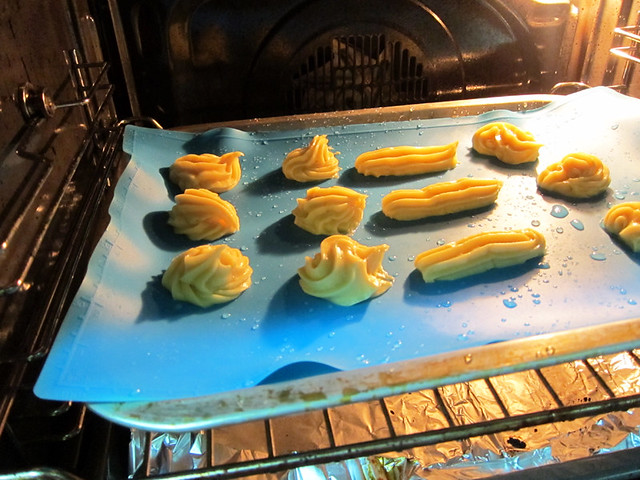
# – Pipe the dough into half of your desired profiterole size onto a greased baking tray, because when cooked they’re going to double in size!

# – Dip you hand into a bowl of water and lightly sprinkle water all over the tray, like this. This is another way to help the choux pastry rise.
# – Stick it in a preheated oven at 200 degrees celcius for 20 minutes.
# – Watch them puff up. You may now do a dance.
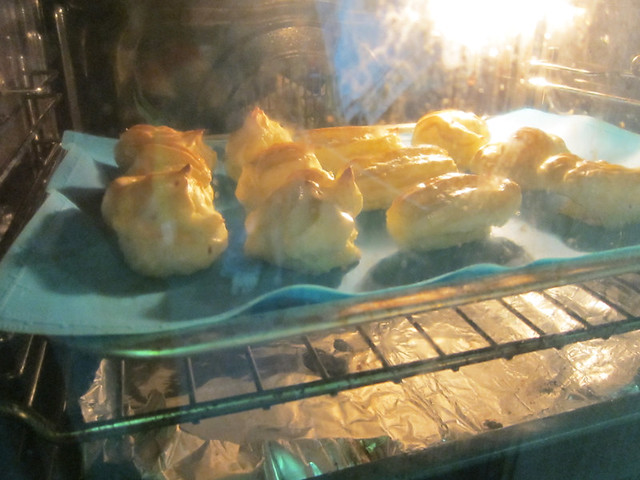
# – As you can see, I made some eclair shapes too so yes, I made eclairs too with this batch…hehehehe.
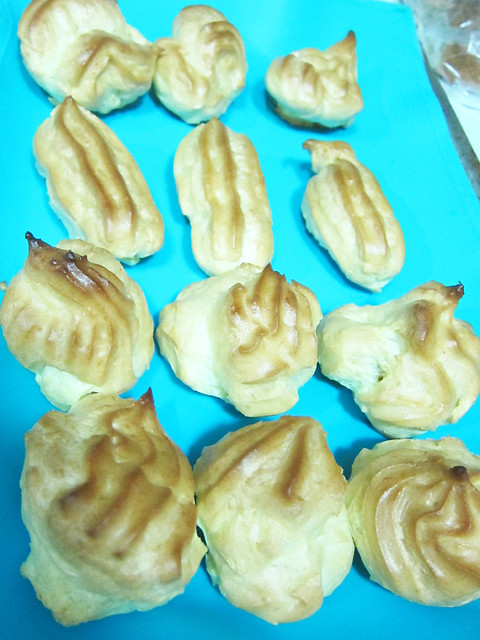
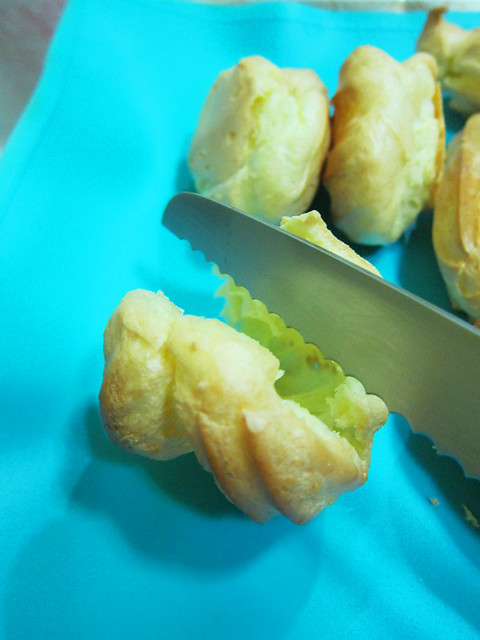
# – Immediately after you take the pastry out from the oven, use the skewer to poke a hole through the under of each pastry. This is to release any pressure built up inside.
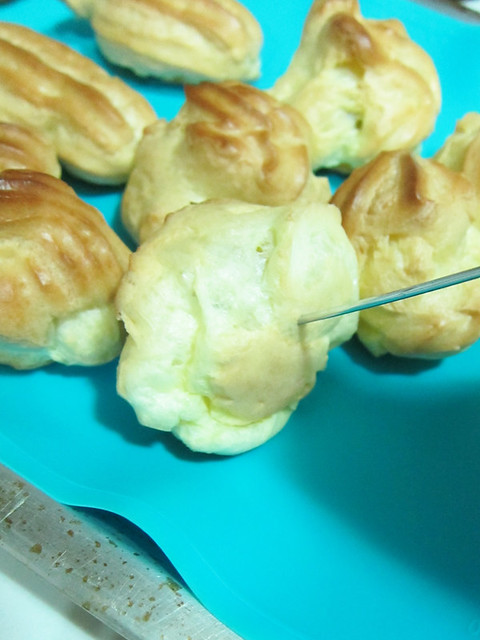
# – Split each pastry into half with a knife.
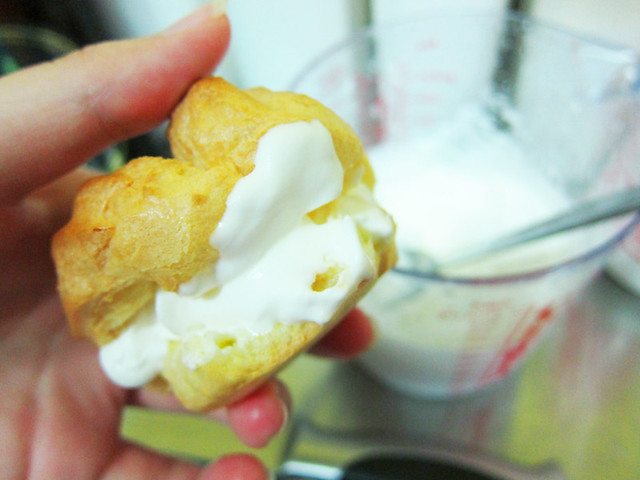
# – When they’ve cooled down completely, stuff each with as much chilled whipped cream as much as you can :D
# – Lay them all on a plate and drizzle generously with warmed delicious homemade chocolate rum sauce (will blog about this tomorrow).

# – Bite into a piece. And there, profiteroles, DONE!
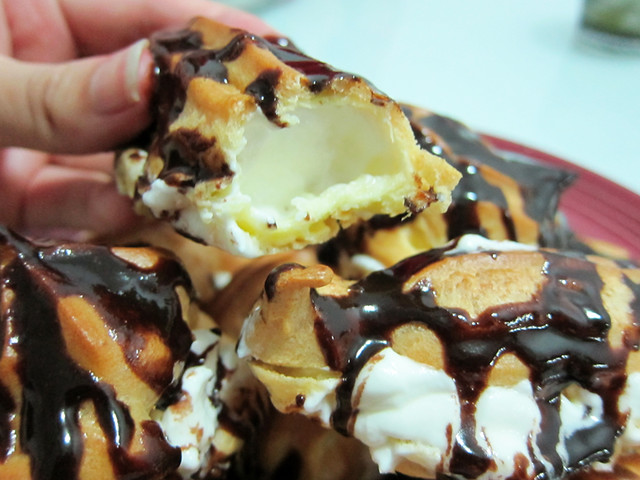
These profiteroles were light & crispy on the outside, with a hollow inside perfect for cradling a good dollop of yummy, milky cream.
The combination of the pastry, cream and rich chocolate sauce is seriously something bordering perfection. What can I say, they were absolutely perfect. The BF and I hoovered up everything at one go, we were quite naughty really…
My apologies while I swim for a little while more in pure self-satisfaction.
Perfect! I want MORE!
congratulations kimberlycun!!! ^^ can u bring me one when i kam bak for summer
anything for you LSA!
Hi kimberly :D i really enjoyed myself reading your blog! keep up the good work! :D and i will try making my own profiteroles soon ! :)
that’s great! good luck to you :D
awesome! beautiful looking puffs.. *thumbs up*
thank you!!! never thought i’d see the day haha
sinful and delicious!
indeed :D
It looks really good =D
Visually appertising and i am sure it taste just as good!
Think it will taste awesome with a custard filling!
thank you! i’d love to try them with custard filling, i love custard filling! yums
so messy!
haha kidding, but i would left off the choco topping.
you are amazing! *thumbs up
thank you!! heh we’re going for epic calories style :D
sometimes i wonder is it worth going to pastry schools to learn baking. I mean, obviously you did this very well, without paying a few thousand ringgit to go to a proper baking school! i think u can sell this and people will still buy even knowing that you do not have a certificate hanging on your wall. hahahah
my friend is in a culinary school and she couldn’t even mix her own buttercake flour (she bought those ready made one in the market)! what’s the point of going to school then!!!!
i do think it’s worth it to go to a school for any skill really. that’s where you get to learn loads of things a home cook would never even dream of. as for your friend, i guess it’s personal choice though i must say it’s quite a waste, perhaps she’s not really that interested in cooking?
Hi kim, been following your blog for your recipes :) yums.. just want to ask where did you get your blue baking mat ( or something like that) :)
cheers and you are a very informative cook :))
i got it in Mid Valley from a booth on the lower ground floor (where all restaurants are), there’s one at pavillion 6th floor and parkson sells them too! thanks :)
Thanks Kim :) will check it out :)
Great to hear that you scored big with this recipe!!!! Now to move to souffles! :p
Thanks! Souffles…../scared
Yeay! They finally worked! Isn’t it brilliant when all that tweaking to a recipe finally pays off!
yes! 3rd time’s the charm they say :D
Wow, SUCCESS since the first attempt! Congrats!
yay! glad it works for you :)
Really enjoyed this post as I ve been itching to try my hand at making profiteroles and you make it look easy… especially with your step by step instructions AND photos!!
Hope it tastes as awesome as it looks!!
good luck! they tasted better :) i’ve made them dozens of times since this post!
Thank you so much for sharing with us! I was wondering why mine are’t puffin until I read your blog! You are a true angel
This recipe was excellent. .. the 1st time I tried Gordon Ramseys recipe n it flopped…
But this was spot on. Thanks so much..
Yayyyy :)
Thank you for this recipe!! After 2 failed tries, I found your recipe and followed it and it worked. The only thing was that after 20 minutes in the oven, as I took them out they started to collapse. So I ended up leaving them in for another 10 minutes on 200 degrees and a further 15 minutes on 175 degrees…and that dried them perfectly. No problems.
Thanks for the step by step instructions…they were invaluable!
Thank you SO much for this recipe :)
First attempt didn’t rise then i tried your recipe.
I was so excited when i saw it rise, i really did scream in happiness.
Sadly they started to get flat /sink as i took it out.
I will test Bridgette’s tip and see how it comes out :)
Thank you! I did my dance! After two fails, one being Gordon Ramsey’s online recipe – they worked!! 200 degrees for 20 minutes. A skewer hole at the end to release the pressure. Perfect.
Kimberley
You’re an absolute star!!! Choux pastry is amazing thank you – and yes I’m dancing!!!!
Thank you Kimberly !
I’ve had 2 previous failed attempts which included the Gordon Ramsey recipe.
Your recipe is simple and they stay puffed up!
Thanks for the tip of cooking the dough for 5mins!
Thank you so much I’ve tried 2 other recipes and this is the first to work!! 3 time really is the charm
Yay! I followed Raymond Blanc recipe twice, and failed. Have done yours 3 times now, and worked every time! Thanks so much!