Fool-proof herb roast chicken recipe.

If I have to name one blogger that inspired me to cook and share recipes on my blog, it would be The Pioneer Woman. For one whole year prior to moving into our current home, I read her blog every single day and fantasized about cooking and making delicious, wholesome food.

She’s the reason why I enjoy cooking so much, her step-by-step pictures make cooking so much less daunting and accessible to someone like me, who had never cooked anything beyond frying an egg. She is an amazing woman; a wonderful mother, wife, a wordsmith, a brilliant photographer and of course, an amazing cook! I’d be happy to be able to achieve 1/10 of what she has.

(Btw, she also has a dog named Charlie! Teeheehee)

So anyway, I found this fool proof herb roast chicken recipe from her. It has become my fallback recipe for whenever I have no idea what to cook but would like something with a bit of a flair…I’d make this roast chicken. It’s ridiculously easy to prepare & cook and tastes perfect.

# – Fool-proof herb roast chicken.

The ingredients:

  • 1 whole chicken about 1.3kg, cleaned & gutted
  • 1 onion, quartered
  • 4 cloves of garlic
  • 1 lemon, halved
  • 1 handful of 3 different herbs, dry or fresh (I used sage, basil and chervil)
  • 60 ml of cooking oil (I used grapeseed oil)
  • Salt & Pepper
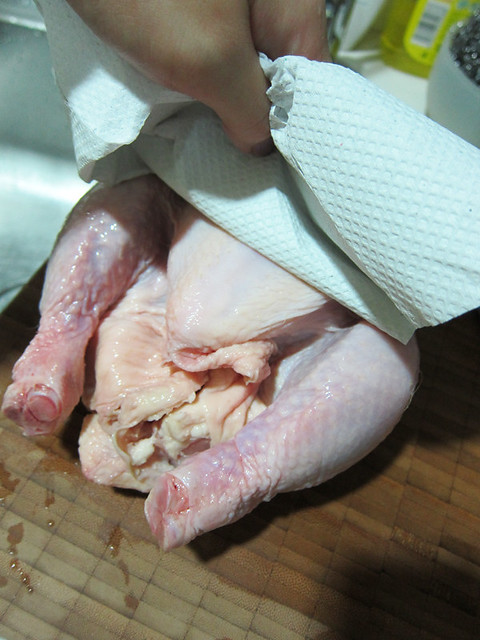
  • # – First, clean and pat the chicken dry with paper towels. This step is important to get crispy chicken skin.

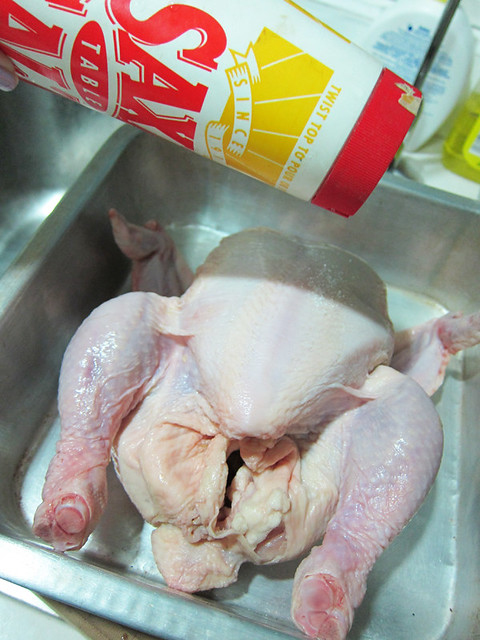
    # – Then, rub salt all over the chicken as well as the cavity.

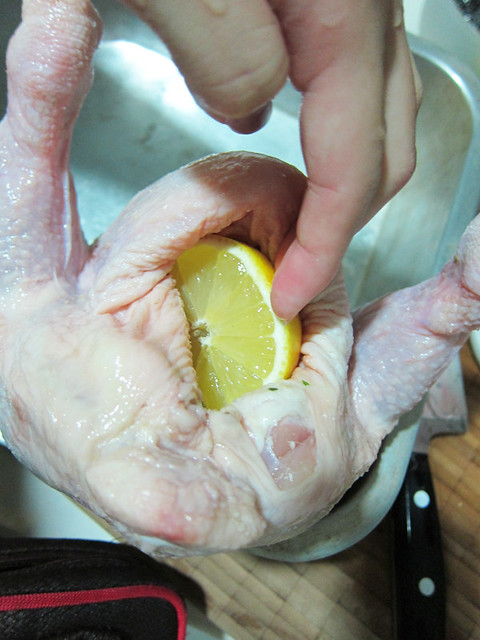
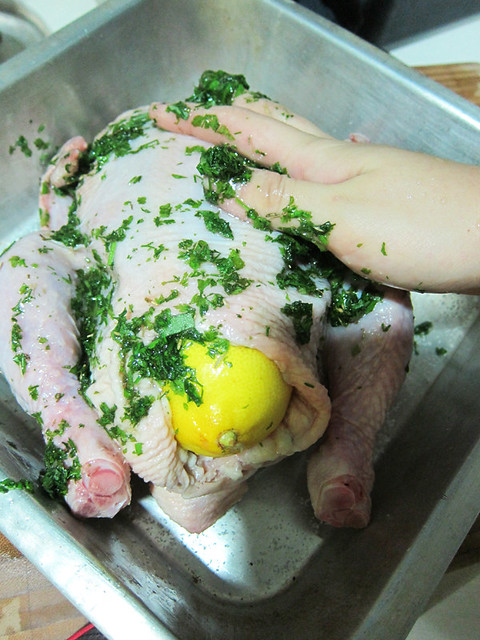
    # – Stuff the cavity of the chicken with the quartered onion, garlic and lemon. Don’t overstuff the cavity or the chicken won’t cook evenly. Set chicken aside.

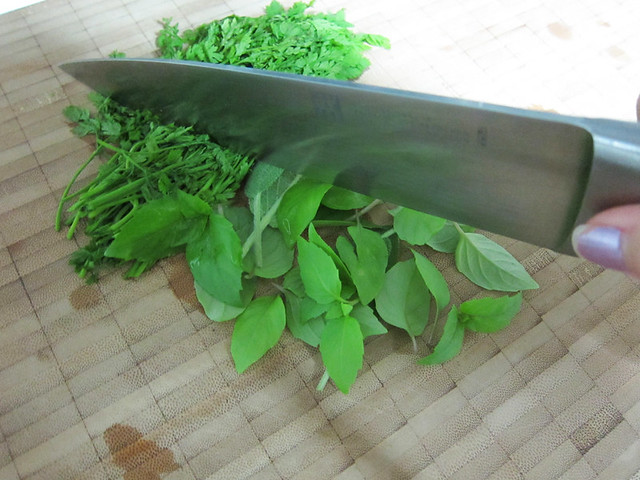
    # – Next, chop up all the herbs finely.

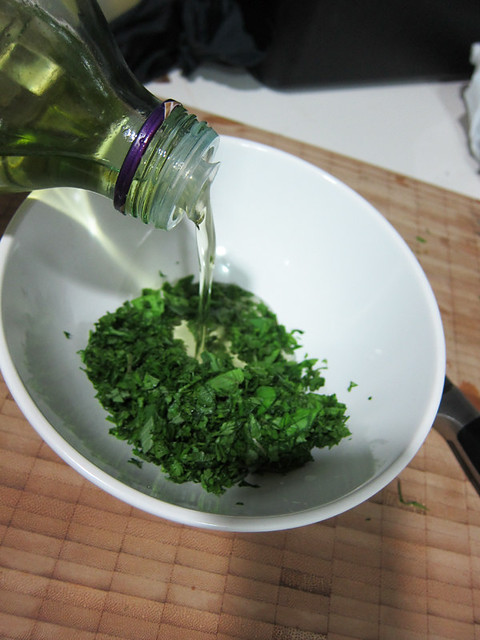
    # – Put the chopped herbs in a bowl and pour in the cooking oil.

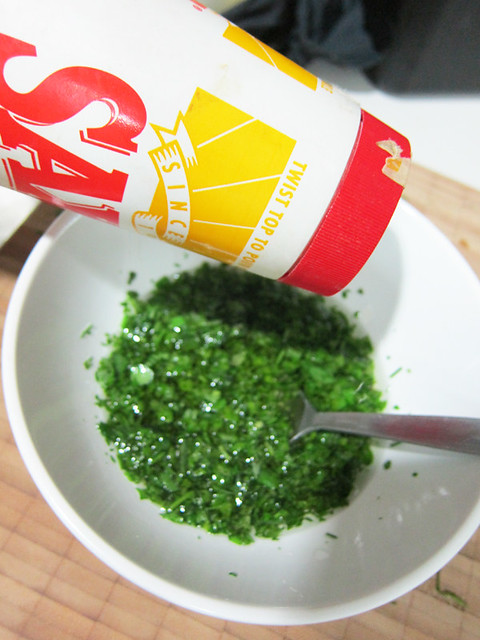
    # – Season the herbs with salt and pepper. Stir to mix.

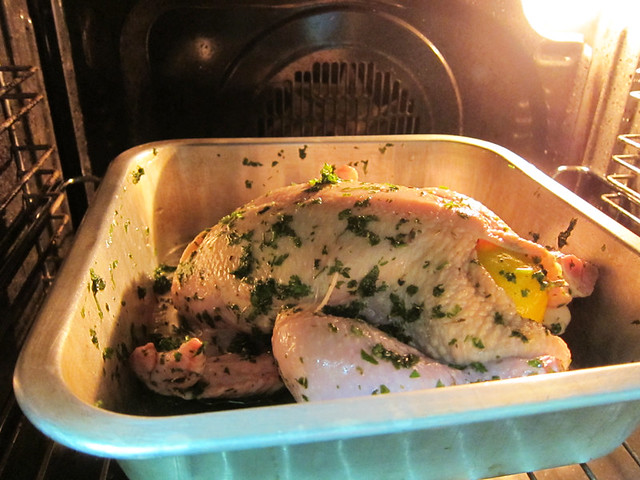
    # – Now, massage the herb oil all over the chicken. Don’t pour in all the oil, the objective is just to get the herbs sticking to the skin. If there’s any leftover herb, feel free to stuff them into the cavity.

    # – Stick it into a pre-heated oven at 230 degrees celcius for 1 hour to 1 hour 15 minutes.

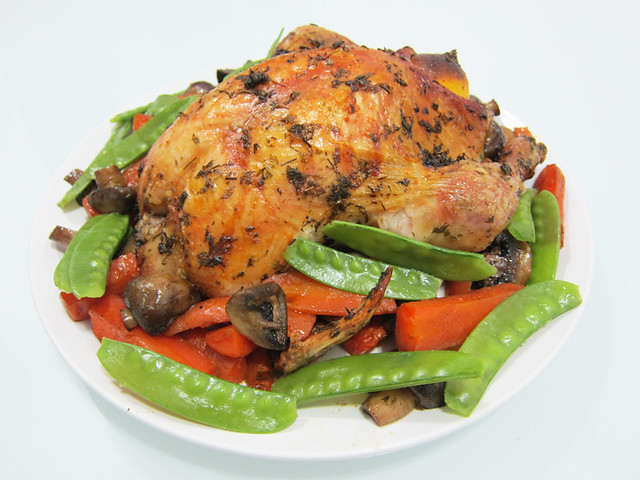
    # – Herb roast chicken, DONE!

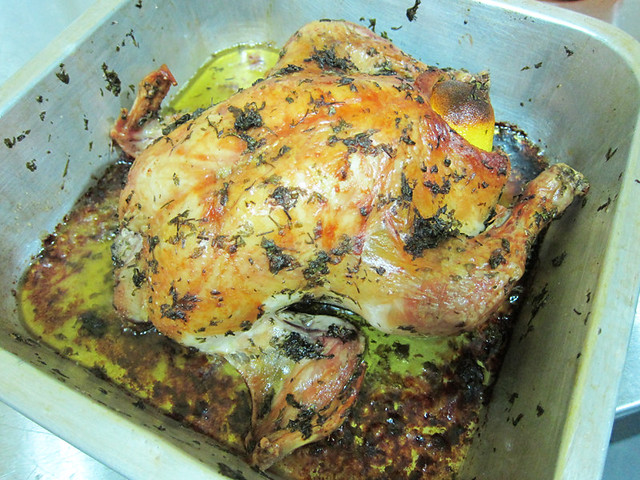
    # – Lift the chicken out from the pool of chicken fat & serve with assortment of roast vegetables.

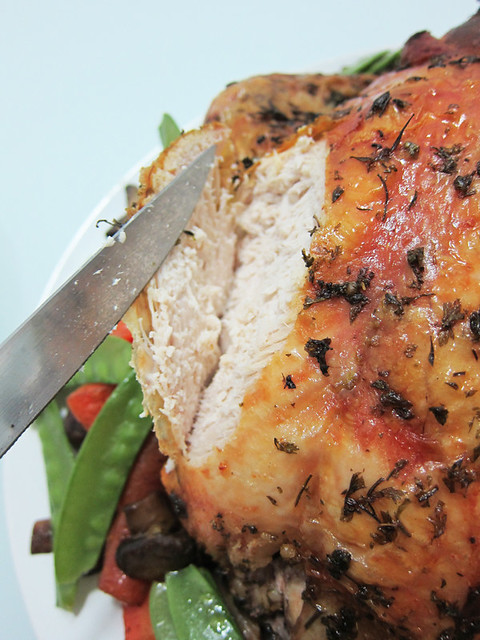
    # – Crispy skin and juicy, aromatic flesh. Yums.

    If you’ve always been afraid to roast a whole chicken, I can understand how daunting it must be. However, this recipe seriously changed my perceptions and I hope it would yours too.

    Crazy easy tomato prawns recipe.

    You know I’ve never cooked prawns in my life till today? Prawns seemed like a hard subject to tackle (by now you’ve probably realised that I have a lot of unfounded fears about MANY things) but with enough persuasion (read: pleading from the BF), I decided to try my hands at cooking it.

    So I bought about 20 or so prawns from Tesco, which were surprisingly cheap…less than RM8 and looked for the easiest recipe I could find. Found it in one of my bargain bin favourites, “Chinese Gourmet Cooking”.

    I tweeked the recipe a bit though, because I didn’t have broccoli or tomato puree. But the result was still tasty nevertheless :)

    # – Tomato prawns.

    Best of all though, it took me only 15 minutes to cook this, including removing the prawns whiskers.

    The ingredients:

  • 15-20 medium sized prawns, remove whiskers
  • 1 green pepper/capsicum, cut into squares
  • 4 slices of ginger
  • 2 shallots, sliced
  • 2 tablespoons of cooking oil

  • The sauce, mix ingredients together:

  • 100 ml of tomato juice
  • 50ml of vinegar
  • 50ml of light soya sauce
  • # – First, heat up oil in a pan and fry the ginger slices and shallots till fragrant.

    # – Add the cut capsicum. Fry for about a minute.

    # – Then throw in the prawns and cook for about a minute (when the prawns have almost turned all orange)

    # – Pour in the mixture of tomato juice, vinegar and soya sauce. Cook for another minute till prawns are cooked through. Don’t cook far too long, you don’t want the prawns to turn rubbery!

    # – Delicious tomato prawns, DONE!

    Like I said, it’s ridiculously easy to cook this and it’s so delicious! As only tomato juice was used, the sauce did not overpower the prawns, allowing the natural taste to come through. It’s finger licking good!

    Drill it.

    For the longest time, the aluminium curtain tracks in our home bugged the shit out of me.

    # – Fugly aluminium curtain tracks.

    I couldn’t hide them because I didn’t have curtain hooks, hence I couldn’t tie the curtain back and hence I couldn’t attach the top of the curtains together to hide the damn track.

    I’m not entirely sure if you’d get what I’m talking about but anyway…the gist is: I had to install curtain hooks which involved drilling walls using a power drill so I could tie back my curtains.

    For some reason, I had decided that I was unable to use one. A power drill that is. That I would rip my walls apart and then drill through my own hand; one of the dozens of tragic scenarios I’ve had managed to conceive.

    # – Gory.

    One afternoon, while the BF was at the pub watching rugby, I ate 5 tablespoons of pure peanut butter. Heap, not level.

    I guess you can call it sugar high or more accurately, The Moment of Madness, I skipped into our storage room and skipped out with the Bosch Power Drill. Then I proceeded to read through the manual. I also watched a few youtube videos, just in case.

    I was like, fuck it….if the walls ripped apart I could plaster it back and if I drilled through my hand I could stitch it up. Yeap, sugar makes me crazy.

    So I started drilling and miraculously, the drill did not slide off the intended path. I also did not rip the wall apart and I also did not injure myself. Instead, I made a clean, deep hole. WOW.

    I proceeded to screw a curtain hook in with my two hands and a screwdriwer. All those eggs in slow carb diet have made me STRONG.

    # – My first hook in a hole.

    Then I started making more holes, and installed more curtain hooks. One screw did break in the middle while I was screwing it in (told you I’m strong) but I didn’t panic. I just put in a shorter screw…

    And then I attached the top of the curtains together, tie the hanging fabric back and voila…

    # – No more annoying aluminium track offending my eyes.

    And hence the conclusion of my story about drilling my very first hole in wall. Thanks for reading.