My favourite dessert in the world – the mango meringue mess

I love my desserts. I need dessert after every dinner. To me, a dinner without dessert is not a complete meal. I’m not particular about it with breakfast or lunch, but every dinner should end with something sweet, be it a fizzy drink, a fruit or pudding.

If I didn’t have dessert after dinner, I’d often end up having a massive, unhealthy supper. So I eat desserts to keep my body in reasonable condition. It is true!

Of all desserts, my favourite is the mango meringue mess. It’s essentially a mango version of Eton Mess, which is made with assortment of berries. I love it so much I could eat it every evening, if it weren’t for occasional concerns about the 35% fat content in whipped cream. And when that happens, I substitute cream with plain yogurt…and my life is beautiful again :D

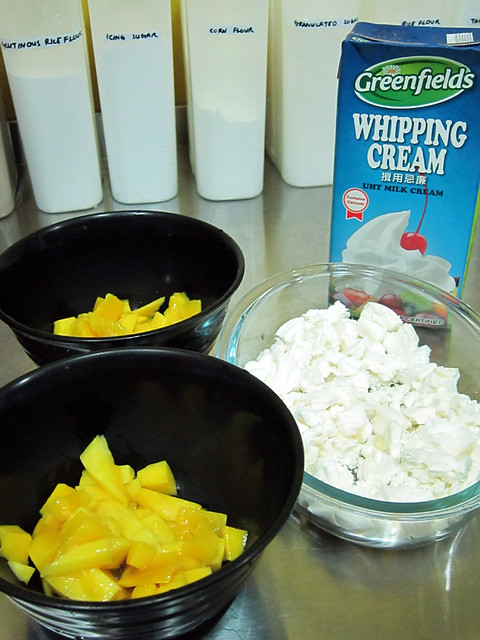
For a 2 people serving, you need:

  • 2 mangoes, cubed and divided into 2 bowls
  • 100 ml of whipping cream, whipped till fluffy
  • About 6 fistfuls of crumbled meringues

Lets begin the journey to heaven…

# – Mangoes, meringues & cream – only 3 ingredients for the best dessert of your life!

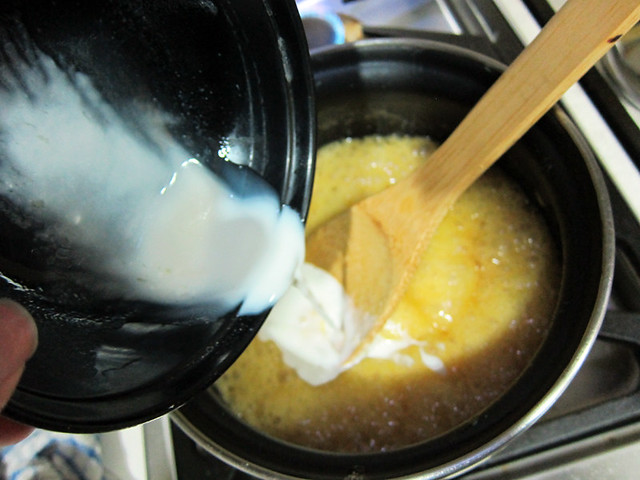
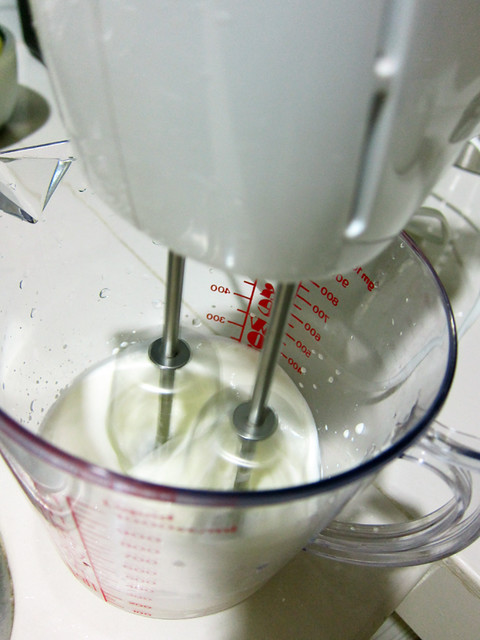
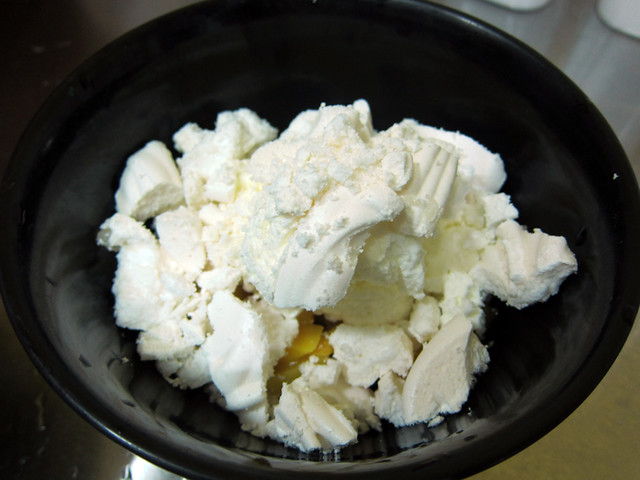
# – Pour 100 ml of whipping cream and beat till double stiff and double in size.

# – Divide the cream equally into each bowl of cubed mangos. Check out my tutorial for easy and quick cubing of mangoes here.

# – Then, divide the crumbled meringues equally into each bowl. Learn how to bake meringues with no stress here.

# – Lastly, you mix them all up so that every spoon has a perfect balance of mangoes, cream and meringues.

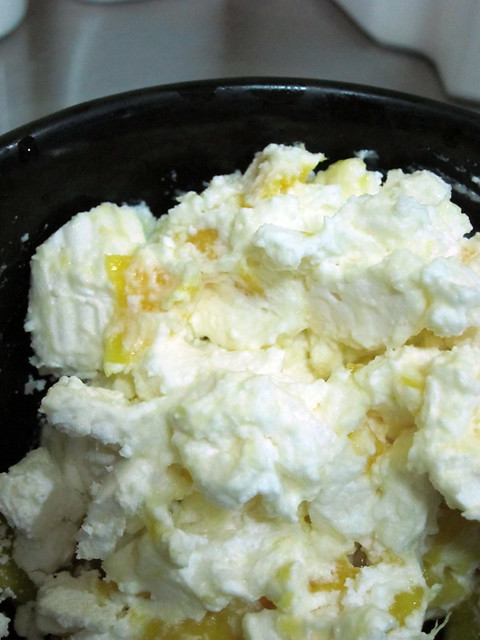
Now, savour the bowl of heaven and after that, you bake more meringues, buy more mangoes and stock up on whipping cream! That’s how we roll it.

P/S: don’t forget to hide the scale!!!

From old bread to sumptuous pudding.

It’s extremely hard for 2 people to finish a loaf of bread before its expiration date. So we freeze bread to keep them longer and heat it up the in the toaster whenever a hankering for bread emerges.

That means I’d be eating toasts up until we get fresh bread. A great idea for my BF who LOVES toasts but I’d much prefer soft, pillowy, sinful white bread any day. And hence, I decided to make bread & butter pudding using bread that we couldn’t finish in time.

This recipe is adapted from BBC Food. Very easy and straightforward, just the kind of recipes that I love to keep.

    For the pudding:

  • Enough butter for spreading 6-8 slices of bread as well as greasing bowl
  • 6 – 8 slices of white bread
  • 50g sultanas
  • Cinnamon powder
  • Nutmeg powder (or freshly grated ones if you’ve got it)
    For the custard:

  • 250ml of milk
  • 150ml of whipping cream
  • 2 eggs
  • 25gm of granulated sugar

# – First, butter 6 slices of white bread and cut each into half, forming triangles.

# – Then lay 4 slices at the bottom of a lightly greased heat-proof bowl. Sprinkle some raisins all over.

# – Add a sprinkling of cinnamon powder.

# – Add more layers of bread, raisins and cinnamon powder until you run out of bread.

# – Top off with a sprinkling of nutmeg for that extra oomph. If you’ve got no nutmeg, just cinnamon will do too ;)

Set the bread aside. It’s time to make the delicious custard!

# – Whisk eggs and granulated sugar in a bowl until the colour turns pale.

# – Heat up whipping cream and milk in a pot till scalding but not boiling.

# – Pour egg mixture into the milk mixture and whisk till combines. Remove from heat.

# – Strain the mixture to remove the stringy egg bits. Custard is now done :D

# – Pour the custard into the bread up until just the bottom of top layers are submerged. You will have more custard left so stick it in the fridge for some awesome chilled custard to serve with the pudding!

# – Stick it in a preheated oven at 175 degrees celcius for 30-40 minutes or until top is brown.

# – After 30 minutes, bread and butter pudding, DONE.

# – The beautiful, creamy, delicious bread & butter pudding.

Pour the chilled custard you’ve made earlier over the pudding and you’ve got yourself a delicious, belly-warming and very yummy dessert.

# – YUMMEH!

And yes, I can now have toasts because I want to and not because I have to!

Making Syrup Bites – you will love it like I do.

When the BF’s mom came to visit a couple of months ago, she brought along an old recipe book that belonged to the BF. It was given to him by his aunt when he moved away to Liverpool for university, in hopes that he would not need to survive on just instant noodles and 1 quid beers.

Thanks to Aunt Jean and that precious recipe book, my BF learned valuable cooking skills which proved very handy whenever I messed up his dinners.

# – The Dairy Book of Home Cookery.

The Dairy Book of Home Cookery now belongs to me. It mostly consists of basic recipes for almost any food you can imagine. One recipe that caught my eye was “Syrup Bites”. Personally, I have never heard of it and even googling did not yield any result. What does it look like? How does it taste like?

# – Syrup Bites?

And because I had all the ingredients in hand, I decided to make 24 pieces of “Syrup Bites”. I’m so glad I did, because they are absolutely DELICIOUS!

Ingredients A

  • 100 grams of self raising flour
  • 75 grams of rolled oats
  • 25 grams of dessicated coconut

Ingredients B

  • 1 teaspoon of bicarbonate of soda
  • 1 tablespoon of milk

Ingredients C

  • 100 grams of caster sugar (I reduced it from the original 125 grams)
  • 100 grams of butter
  • 2 tablespoons of golden syrup (you can also use honey or treacle)

# – First of all, mix Ingredients A (oat, self raising flour and dessicated coconut) together in a bowl and set aside.

# – Then, mix Ingredients B (milk and bicarbonate of soda) together in a small bowl and stir until bicarbonate of soda dissolves. Set aside.

# – Next, heat up a pot and put all of Ingredients C (butter, sugar and golden syrup) into it. Keep stirring till everything’s melted.

# – Pour ingredients B into the sugary, buttery mixture. Keep stirring.

# – The mixture will expand quite a bit, don’t panic and just keep on stirring. Remove from heat.

# – Now pour the concoction into Ingredients A.

# – Keep stirring until everything is mixed up like this. Leave to cool for 30 minutes or until quite firm.

# – Roll into 24 round pieces. To be honest, it was actually quite difficult to roll, you’d likely find yourself compressing it within your palm till it forms a ball.

# – Lay them out on a greased baking tray with parchment paper. Leave some space between each ball for expansion.

# – Stick it in a preheated oven at 180 degrees celcius for 15minutes.

# – 15 minutes later, golden brown, oat-ey goodness!

# – They will feel rather soft right out of the oven, but leave them on a wire rack to cool completely and they shall firm up entirely.

# – Perfect with creamy cold milk.

# – So this is how “Syrup Bites” look like.

After some research, I realised that Syrup Bites is actually very similar to ANZAC biscuits, which were created during World War 1 for soldiers’ rations. As it doesn’t have eggs, they keep really long as long as there’s no moisture.

On it’s own, it’s very crunchy without being dry and the buttery coconut-ty sweet golden syrup taste is simply to die for! When dipped in cold milk however, it softens up slightly and become a whole new level of delicious.

And because it’s got so much oats, I’d like to think that it’s healthy, almost ;)