Salted chunky chocolate chip cookies recipe.

This has totally become one of my favourite recipes. I have made it 3 times and I’ll probably make it again later today.

# – Salted chunky chocolate chip cookies.

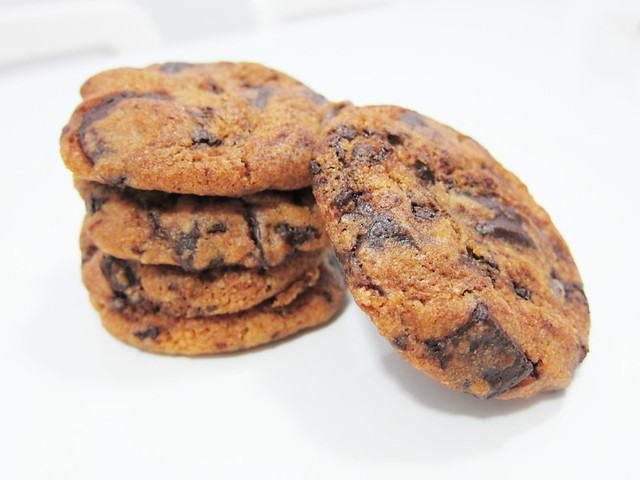
The recipe works everytime! Want cookies that are not so sweet, crispy on the outside, chewy in the middle with melty chunky choocolate oozing out? This is the recipe for you.

The ingredients:

  • 115g of salted butter, softened at room temperature
  • 110g of brown sugar
  • 100g of caster sugar
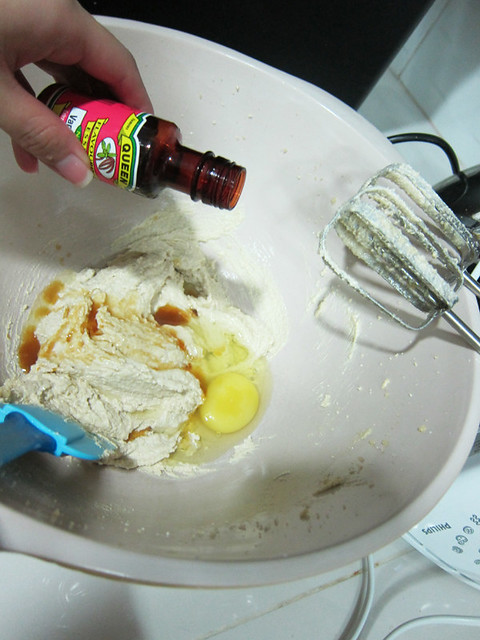
  • 1 egg, at room temperature
  • 1/2 teaspoon of vanilla essence
  • 180g plain flour
  • 1/2 teaspoon of bicarbonate soda
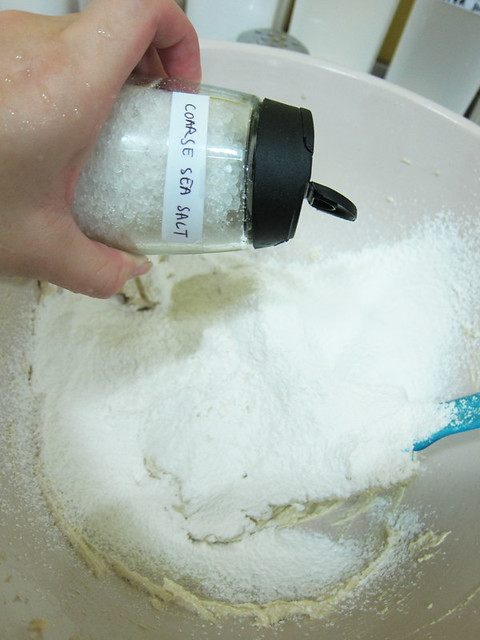
  • 1/2 teaspoon of coarse sea salt
  • 200g of dark chocolate, coarsely chopped

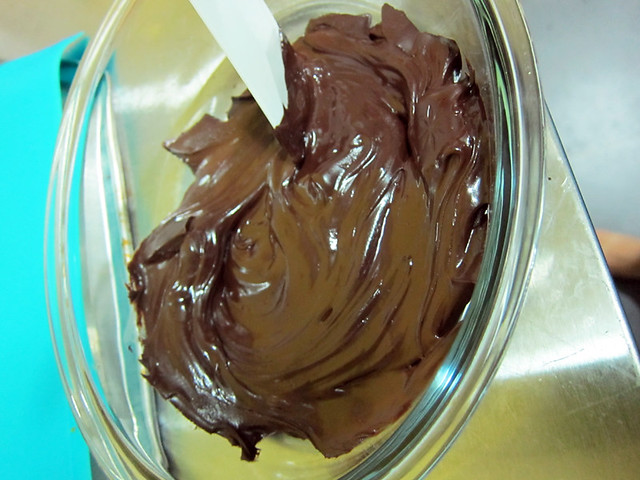
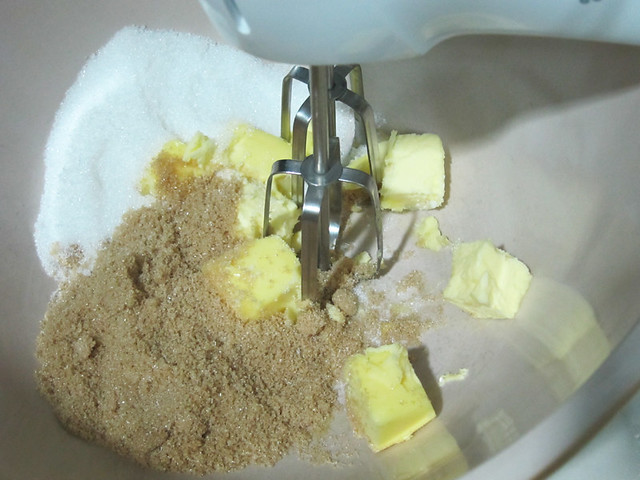
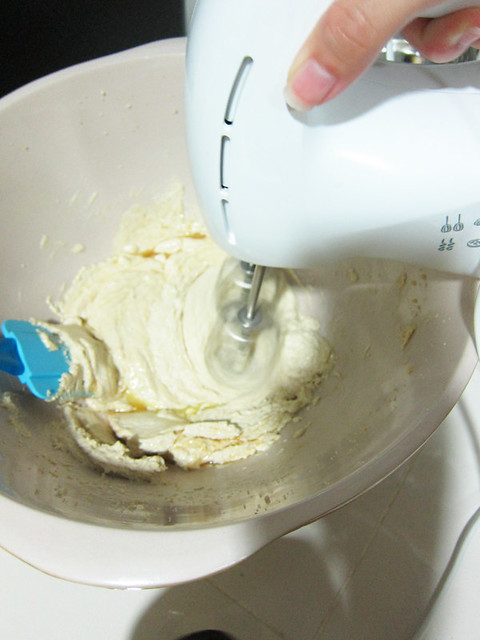
# – First, beat the caster sugar, brown sugar and softened butter till creamy.

# – Then crack an egg over the mixture and add 1/2 a teaspoon of vanilla essence.

# – Beat till combined and creamy.

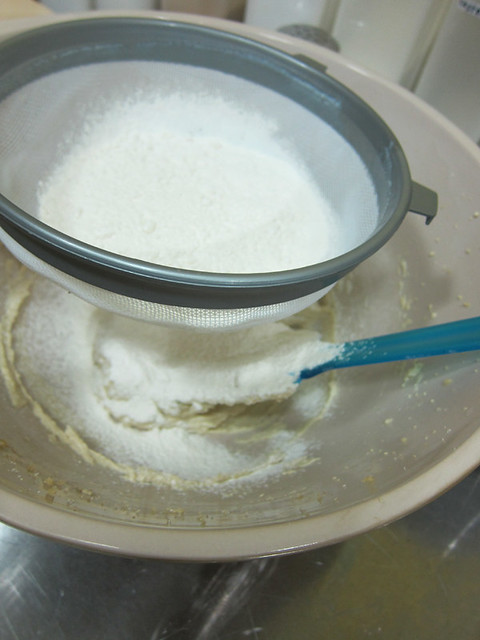
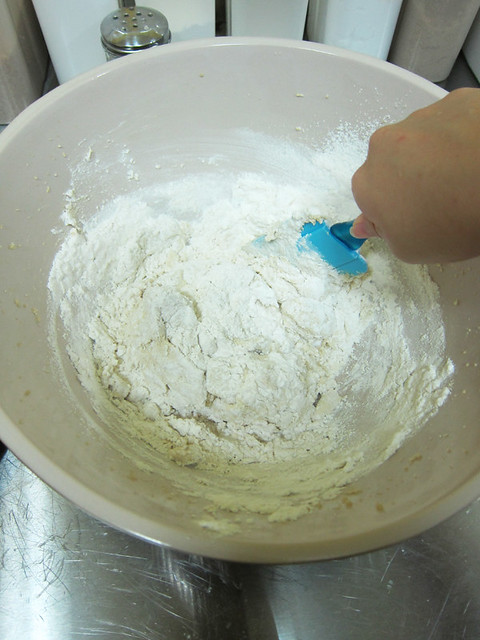
# – Now, sift in the flour and bicarbonate soda.

# – As well as the coarse sea salt.

# – Fold to combine.

# – Then throw in the roughly chopped dark chocolates.

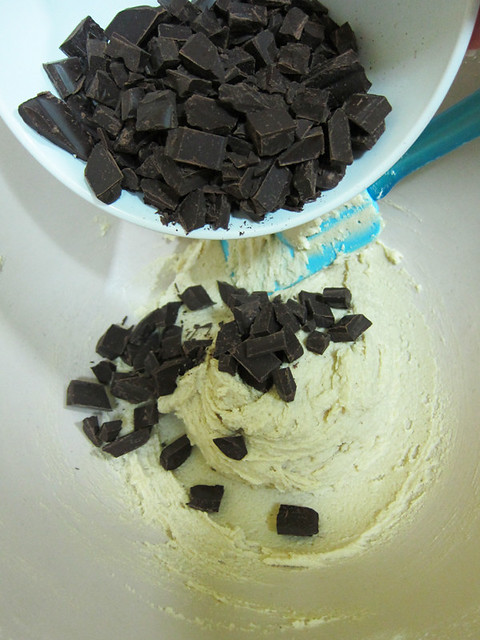
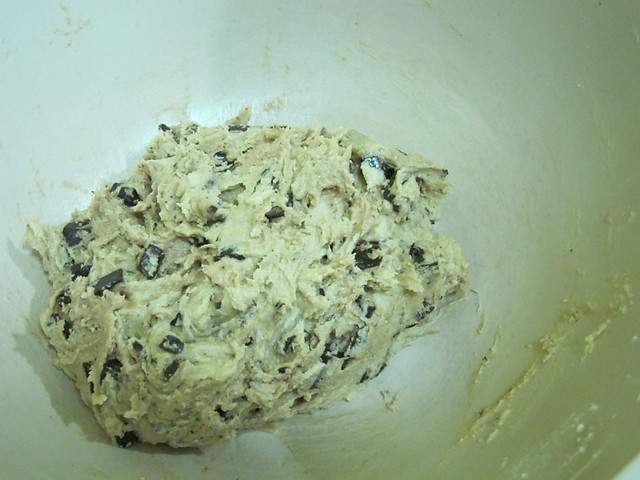
# – Mix till combined, refrain from eating cookie dough…or not.

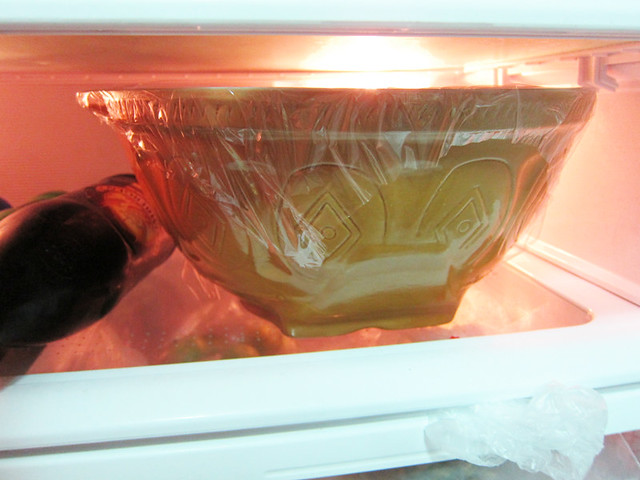
# – Cover bowl with clingfilm and stick it in the fridge to chill for at least 2 hours. I chilled mine overnight though.

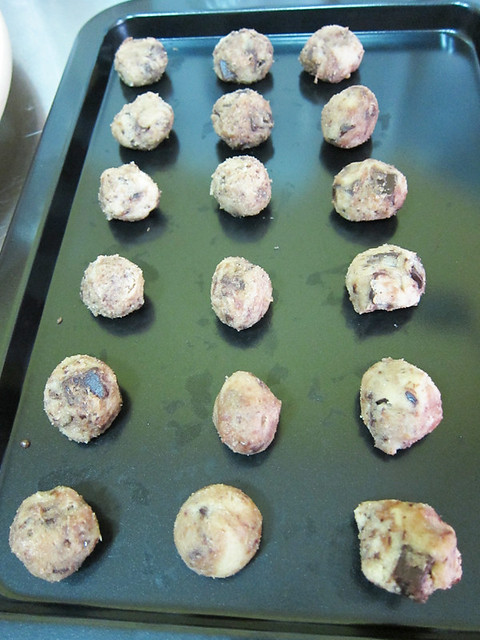
# – To make the cookies, work with the dough while it’s still chilled. It’s normal for it to be quite hard and you probably need a hard metal spoon to help you hack at it. Form balls the size of a walnut and arrange them on a non-stick baking tray or one that’s greased and lined with non-stick baking paper. This recipe makes a maximum of about 75 decent size cookies!

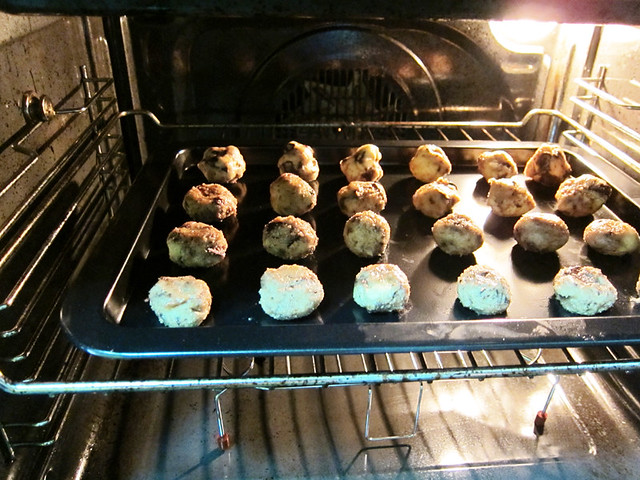
# – Stick it in a pre-heated oven at 180 degrees celcius for 10 minutes.

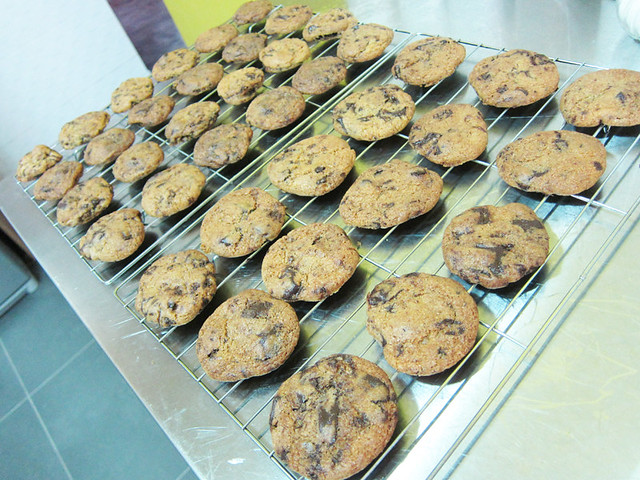
# – When the cookies are done baking, remove from oven and loosen them up from the tray with a spatula.

# – Allow to cool completely on wire rack.

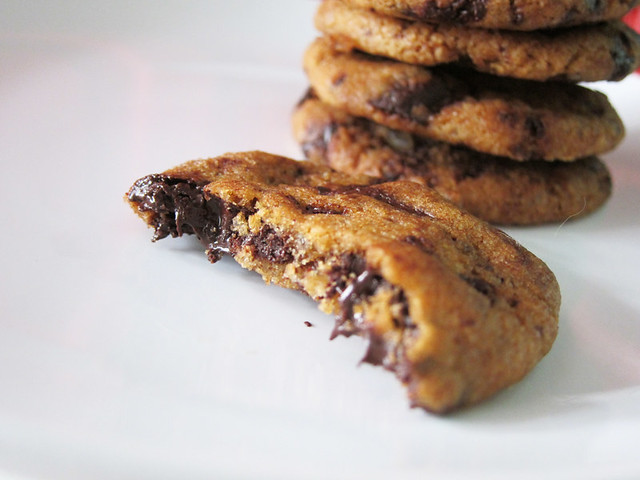
# – Salted chunky chocolate chip cookies, DONE!

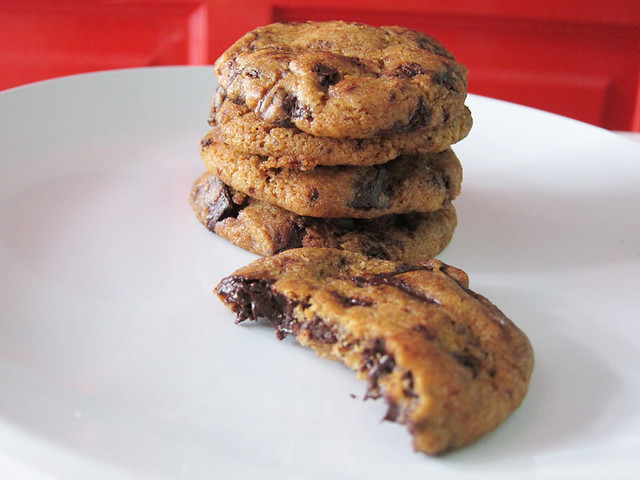
I love these cookies so much, with pops of saltiness coming through the decadent chocolates…DIVINE!

# – Hmmmmm.

Thank you Citrus & Candy for sharing such a wonderful and straightforward recipe.

Individual mango chocolate pavlova recipe.

When LSA was back in town recently, we got her to pop over for some homemade dinner. I made this as a dessert because:

1. It’s simple to whip up the meringue and just let it bake for 2 hours while I continue with the rest of the cooking.
2. Chocolate pavlovas are possibly one of my favourite things in the world.

I realise I should have made something that LSA personally likes, but I guess I’m just pushy like that….

# – Individual mango chocolate pavlova.

Anyway, while I was busy setting out the table and all, LSA asked me, “Kim, can I check with you what is your policy about centipedes?”

“Huh?”

“If you’re looking at one, would you leave it alive or would you kill it?”

“Huh?”

And less than a second after I responded, a centipede crawled really fast into Charlie’s pen right before my eyes. WHAT THE EFFFFF???

Long story short, LSA helped me killed it by courageously squashing it to death with some paper towels while I held on to a chair ready to jump on it lest it crawled towards my direction.

LSA, I <3 you, hahahahahhaha. For the pavlova:

  • 4 eggwhites
  • 200 grams of caster sugar
  • 4 teaspoons of cornflour
  • 1 teaspoon of lemon juice or vinegar
  • 3 tablespoons of cocoa powder

For the filling:

  • 300 ml of whipping cream, whipped up
  • 2 mangoes, peeled and cut into cubes

# – First, in a clean and greaseless bowl, beat the egg whites.

# – When the egg whites have doubled in size, gradually pour in the caster sugar and continue beating.

# – When the egg whites have turned glossy, add in the lemon juice. Lower the beating speed.

# – While slowly beating, add the cornflour.

# – And lastly, the cocoa powder. When the mixture has turned an even chocolate colour, stop the beaters.

# – Stick the mixture in a piping bag and pipe out 6 bird’s nest designs on a non-stick baking sheet. If you don’t have a piping bag, just spoon the mixture over and aim for a pretty rustic look ;)

# – Stick it in a preheated oven at 130 degrees celcius and bake for 2 whole hours. This is how they looked like after baking. My tray was too small so I couldn’t pipe out 6 nests properly, so I just piped out small chocolate meringues all around with the leftover :D

# – Put a few dollops of cream over the next and sprinkle with fresh mango cubes. Individual mango chocolate pavlova, DONE!

# – Chocolatey, crispy on the outside and chewy in the middle. It went down absolutely well with cream and juicy mangoes.

A dessert like this cost would probably cost like a minimum of RM12 outside for ONE serving. I could make 6 servings for under RM10! It is quite ridiculous isn’t it? To think that the effort involved also wasn’t that much really.

If you’re worried about making meringues, just check out the tips I’ve posted here. You can of course substitute mangoes with other fruits of your choice.

Happy baking!

How to make peppermint chocolate sticks candy.

I made this at 3am last night after being briefly comatosed (2 hours) from half pint of beer. With ice. I’m a cheap drunk like that.

# – Peppermint bark candy.

In my defense, I don’t normally knock out so quickly especially if I had something to focus on, such as a movie or a conversation.

But, it was a balmy evening, BF was busy with work so I was left to my own device, Charlie was sleeping quietly on my foot, I was flipping through a book called “The Chocolate Bible” while sipping iced beer and before I knew it, I fell asleep with peppermint bark in my mind.

# – Only 5 ingredients! #winning

I popped up after the effect of alcohol had worn off and all I wanted to do was make the damn candy. These things are fated.

The ingredients:

  • 200 grams of chocolate (by the way, I used Ikea’s 60% dark chocolates which are MUCH cheaper and taste significantly better than those overpriced cooking chocolates. Which is why I bought 1.5 kilograms of them :P)
  • 1/2 teaspoon of peppermint essence
  • 115 grams of granulated sugar
  • 150 ml of water
  • 4 tablespoons of dessicated coconut

# – First, boil the water and granulated sugar in a saucepan on medium heat. Stir until all sugar has dissolved.

# – Allow the sugar mixture to boil on its own for about 13 minutes or till it has turned into amber colour. Immediately stir in the peppermint essence.

# – Pour the mixture onto a greased metal baking tray. Don’t use paper like I did as it may stick. I had to painstakingly break off the bits with papers stuck on it to be discarded. Tilt the tray to make sure the sugar has spread out evenly. Be very careful as liquid sugar is extremely hot!

# – Leave it to set for an hour or stick it in the fridge for 15 minutes. The sugar should harden and you can lift it off the tray.

# – Bash the sugar into small pieces with the end of a rolling pin or a pestle. Set aside.

# – In the meantime, melt the chocolate. You can do it with a double boiler or stick it in the microwave for 2 minutes at Medium Low.

# – Dump in the peppermint sugar and dessicated coconut into the melted chocolate.

# – With a spatula, stir till everything is well coated.

# – Dump the mixture onto a silicon sheet or baking tray. With a knife or long spatula, spread it out as thinly as possible. Stick it in the fridge to chill for a minimum of 30 minutes.

# – When the chocolate has set, use a sharp knife to cut it into sticks.

# – Peppermint chocolate stick candy, DONE!

Fans of peppermint flavour would LOVE this! The peppermint candy gives the chocolate a lovely cool crunch while the dessicated coconut keeps the mint flavour from getting too harsh with its own brand of sweetness that would remind you of the sun, sea and beach.

If you asked me, this candy conjures up images of Christmas in the tropics, which is apt because I live in Malaysia. It’s 6 months too early but this is going into my Christmas menu for this year. By the way, unless you know how to temper chocolates (a process that keeps the chocolates glossy and solid in room temperature), you got to keep these babies chilled.

Addictive!