The brownie pudding cake recipe.

It’s called brownie pudding cake because it’s basically 2 desserts in one. How? During baking, it separates into brownie on top of a silky chocolate pudding.

# – The brownie pudding cake.

This took me about 5 minutes to prepare. I’m serious. 5 MINUTES! Just mix everything up and then stick it in the oven for 30 minutes.

Ingredients A:

  • 120 grams of flour
  • 60 grams of cocoa powder
  • 60 grams of granulated sugar
  • 2 teaspoon of baking powder
  • 1 teaspoon of salt

Ingredients B:

  • 100 ml of olive oil
  • 100 ml of milk
  • 1 teaspoon of vanilla essence

Ingredients C:

  • 60 grams of brown sugar
  • 20 grams of cocoa powder

Ingredient D:

  • 200 ml of boiling water

# – First, mix Ingredients A together in a mixing bowl.

# – Next, mix together Ingredients B in a pitcher.

# – Next, pour Ingredients B into Ingredients A.

# – Mix it up till just combined with a wooden spoon.

# – Like this…

# – Pour the mixture into an 8″ cake tin. Combine Ingredients C and sprinkle it all over the top.

# – Then, pour the boiling hot water over.

# – Stick it into a preheated oven at 180 degrees celcius for 30 minutes.

# – Serve immediately with a dollop of vanilla ice cream :)

Sticky, chocolatey and moist with it’s own sauce! It’s crazy how fast it took me to make this!

I whipped it up right after setting the dinner table, stuck it in the oven and had a pleasant dinner while it baked. Absolutely perfect if you’re pressed for time and don’t know what to make for dessert.

I admit, it’s not the most beautiful thing to look at…but hey, if your guests asked, just say you’re going for a rustic look :D

Individual sticky chocolate puddings.

This is one of few desserts that I made which the boyfriend happily said he would pay good money for the same thing outside. I was a little worried at first because the exterior of the pudding looked a bit dry, but thankfully it was far from dry.

It had a crispy exterior with an inside that was a combination of both spongy and sticky, not unlike a very good brownie. Yeap, the individual sticky chocolate puddings were delicious! The boyfriend loved his with vanilla ice cream and a drizzling of blackcurrant coulis while I had mine just with coulis.

# – Individual sticky chocolate pudding.

This is a deliciously rich dessert, perfect for chocolate lovers :D

The ingredients:

  • 12 tablespoons of flour, sifted
  • 1 tablespoon of cocoa powder, sifted
  • 1 teaspoon of baking powder, sifted
  • 60 grams of butter
  • 60 grams of dark chocolate (I used 60% cocoa)
  • 4 tablespoons of granulated sugar
  • 2 eggs

To serve:

  • Any kind of berry coulis (which I cheated by melting blackcurrant jam with some water, hehe)
  • Vanilla ice cream

# – First of all, sift the flour, baking powder and cocoa powder into a mixing bowl and set aside.

# – Now, set up a double boiler by boiling water in a pot and then suspend a larger bowl over it. Please don’t let the bottom of the bowl touch the water. My setup looks a little different as I happen to have a small bowl with ears that suspend perfectly over the pot.

# – Now dump in the dark chocolates, granulated sugar and butter into the bowl.

# – Stir till everything’s melted and combined.

Otherwise, you can pop the bowl of chocolates, sugar and butter into microwave at HIGH for 2 minutes then stir till everything’s combined ;)

# – Beat one egg well and then pour it into the chocolate mixture while whisking it. You will notice that the mixture will start to thicken almost immediately. Turn off heat but keep whisking till you can no longer see traces of egg.

# – Now remove chocolate mixture from heat.

# – Pour it into the flour mixture.

# – Mix with a wooden spoon. I wouldn’t recommend using a whisk like I did here cause it’s sticky!

# – Beat the other egg and pour it into the mixture. Continue mixing…

# – Now grease up 3 ramekins with butter. My ramekins can fit up to 200ml in volume each and is 3.5 inches in diameter, pretty standard stuff. You can also use deep muffin tin.

# – Spoon the mixture into all 3 ramekins. Yes, this recipe serves 3.

# – Stick it into a pre-heated oven at 190 degrees celcius for 13 minutes.

# – They’ve risen!

# – Run a knife around the pudding to loosen it from the ramekin. Then leave the puddings to cool.

# – After they’re cool enough to handle with your hand, pop them out.

# – Serve with a berry coulis.

# – The tartness of the coulis goes really well with the rich, sticky chocolate pudding.

# – Or like my boyfriend, eat it with some good vanilla ice cream and a drizzle of coulis.

You don’t have to serve them immediately but try not to leave them out too long. You could set them aside for a while (but not in the fridge) and them warm it up in the microwave or a pre-heated oven for about a minute before serving.

As for the coulis, I just dissolved 2 tablespoons of blackcurrant jam with a few dashes of hot water. You can make coulis from scratch of course but I was well, lazy…..

Hope you like this recipe! :D

The chocolate, beer and yogurt cake with peanut butter frosting!

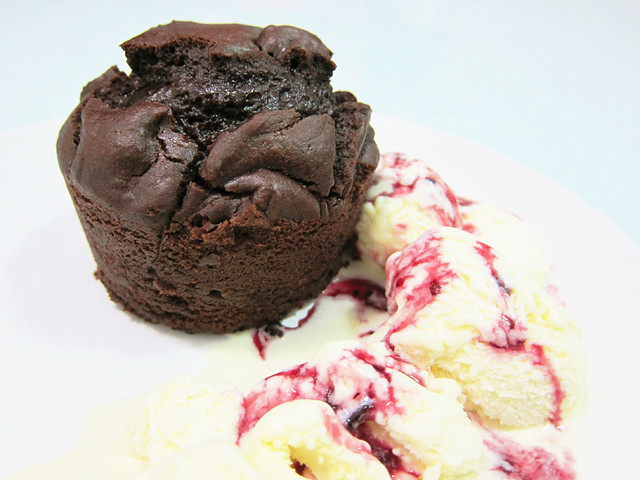
Otherwise known as Perfection.

Cause seriously, what is not perfect about a cake that combines the best of chocolate, beer, yogurt and wait for it, peanut butter in one whole package?

# – Perfection.

I adapted the recipe (originally called Chocolate Stout Cake with Peanut Butter Frosting) from Donna Hay’s 50th issue, where I replaced stout with lager, sour cream with yogurt and smooth peanut butter with chunky peanut butter.

I love this Donna Hay magazine! If you remembered, I also adapted a very successful chocolate buttermilk layer cake from it.

Anyway, this cake is fluffy and so moist (I suspect that’s the work of the yogurt) with a hint of beer and taste of the chocolate enhanced and heightened by the bitterness from the lager. With the very peanut-ty peanut butter frosting, each spoonful of cake is simply sublime…beautiful!

I particularly love eating it while watching an episode of Glee.

Everyone is bound to like either chocolate, beer, yogurt or peanut butter, so this cake is a sure-winner. If you know of anyone who doesn’t like either one of these…please let me know because I’d really love to shove a lightbulb down their throats because they need to lighten up!

Without further ado, lets see how perfection is attained…

For the cake:

  • 125 ml of beer
  • 115 grams of butter, chopped
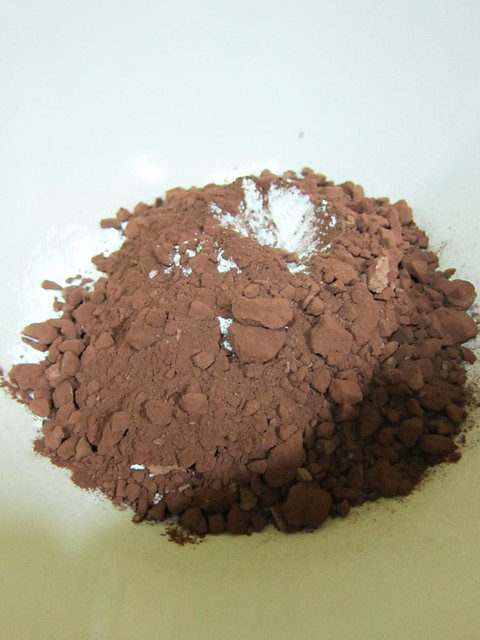
  • 35 grams of cocoa powder, sifted
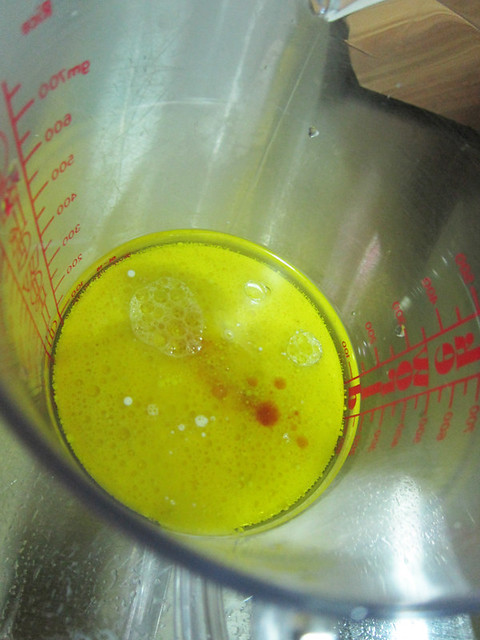
  • 1 egg
  • 80 grams of plain yogurt
  • 150 grams of flour, sifted
  • 3/4 teaspoon of bicarbonate soda, sifted
  • 180 grams of caster sugar

For the frosting:

  • 160 grams of icing sugar
  • 280 grams of chunky peanut butter
  • 80 grams of butter, softened
  • 80 ml of whipping cream

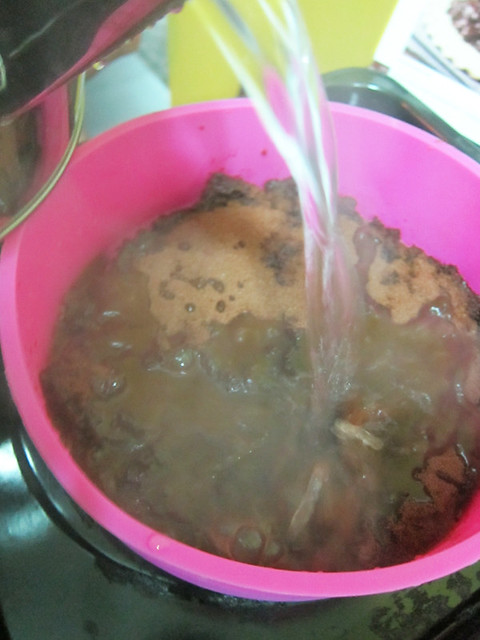
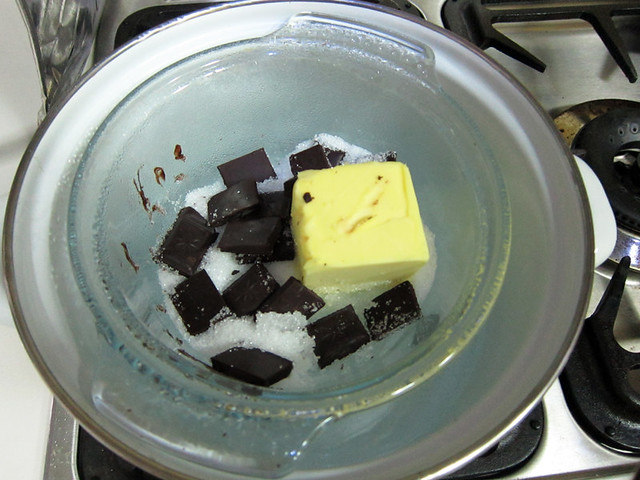
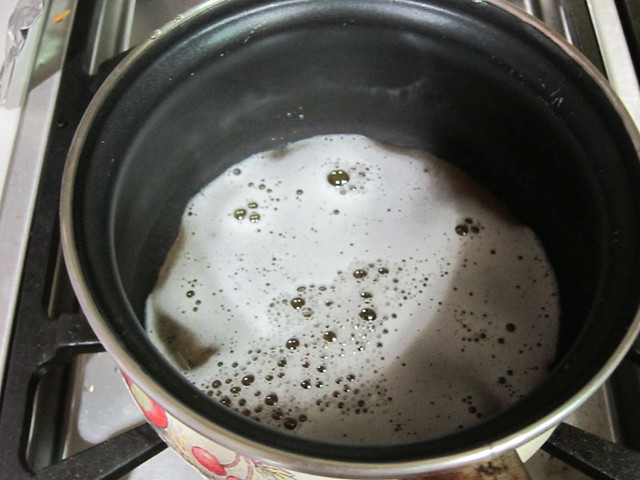
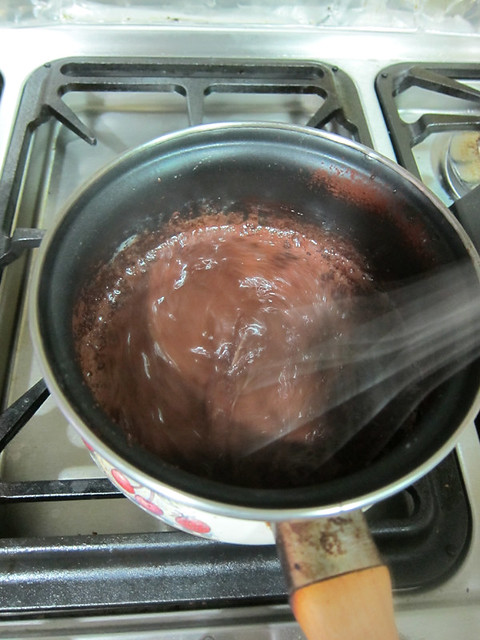
# – First, heat up a pot and pour the beer into it.

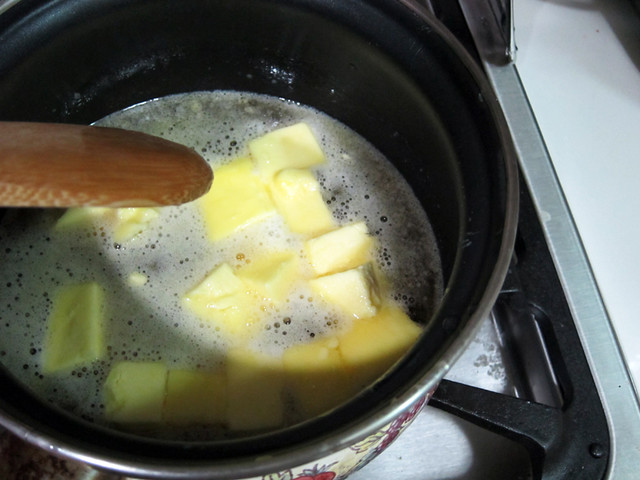
# – Then, throw in the butter and stir till butter has melted.

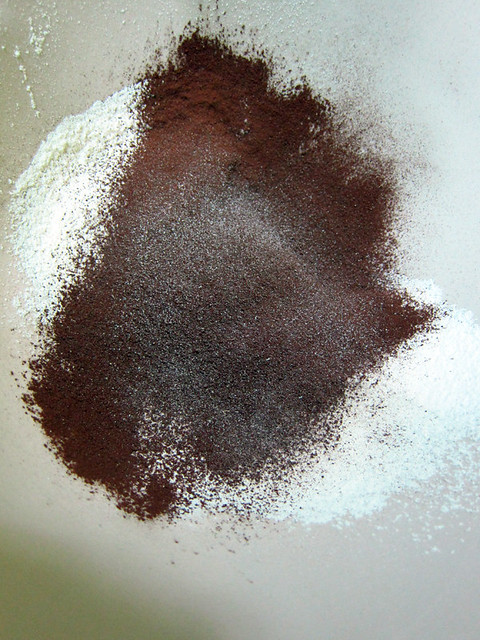
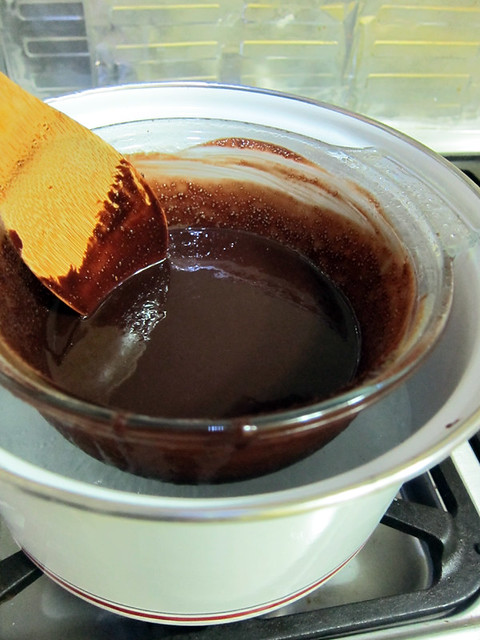
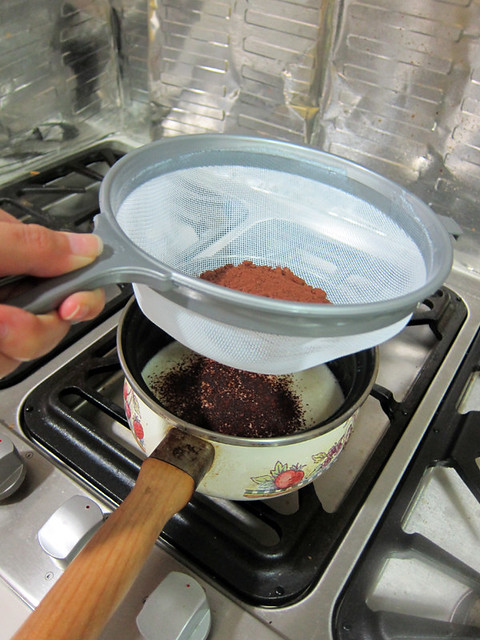
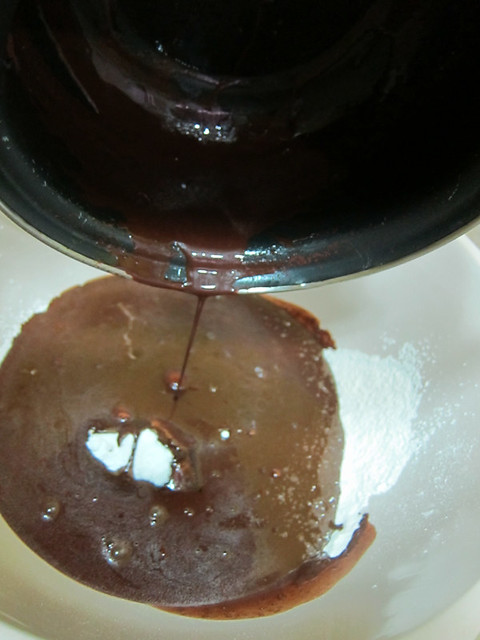
# – Next, sift the cocoa powder into the beer butter mixture.

# – Whisk till all’s combined. Remove from heat and set aside.

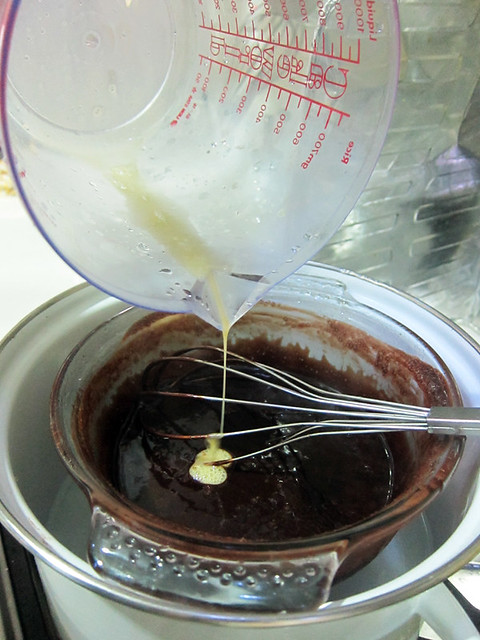
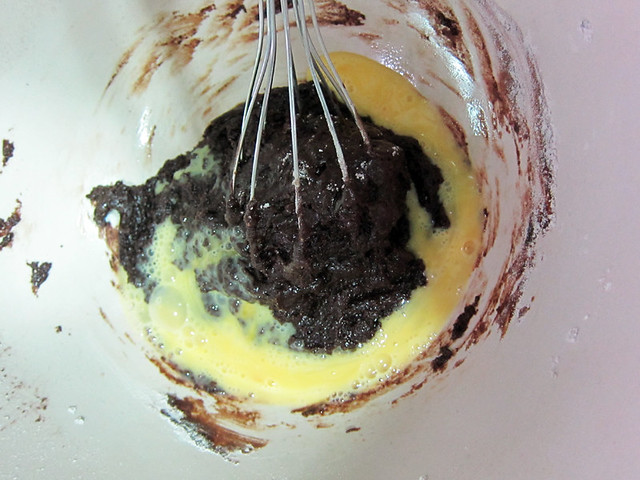
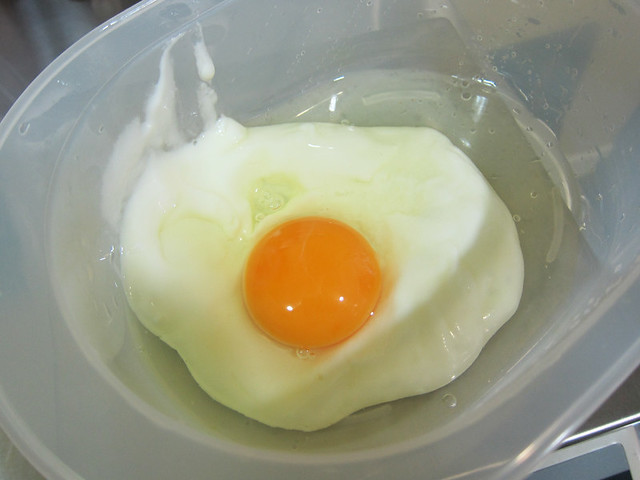
# – Now, in a bowl, break an egg into the yogurt. I can’t stop staring at this picture. Egg yolk gazing should be adopted as a therapeutic treatment.

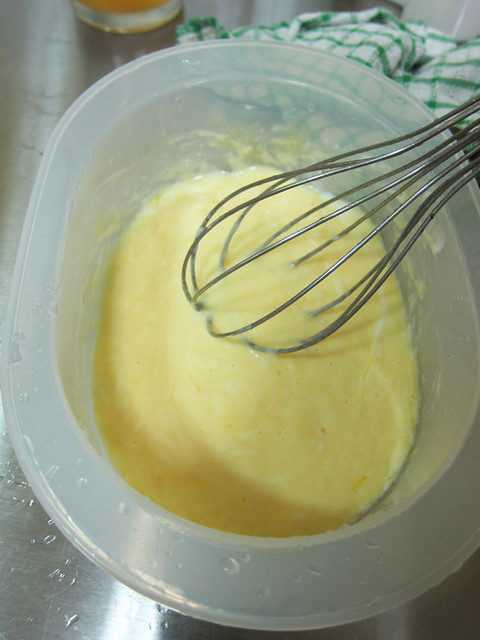
# – Whisk till they are completely combined. Set aside.

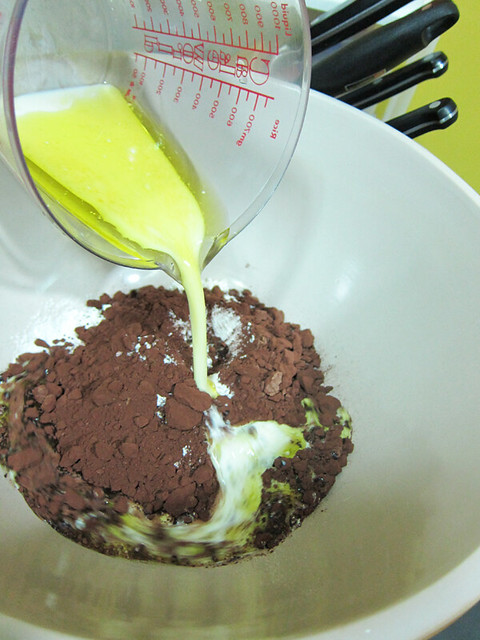
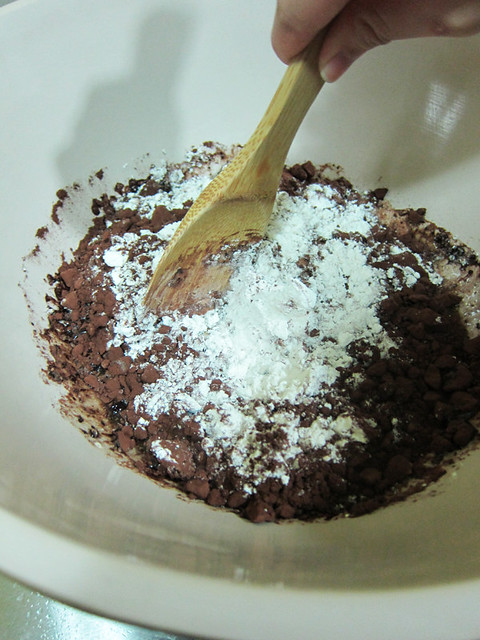
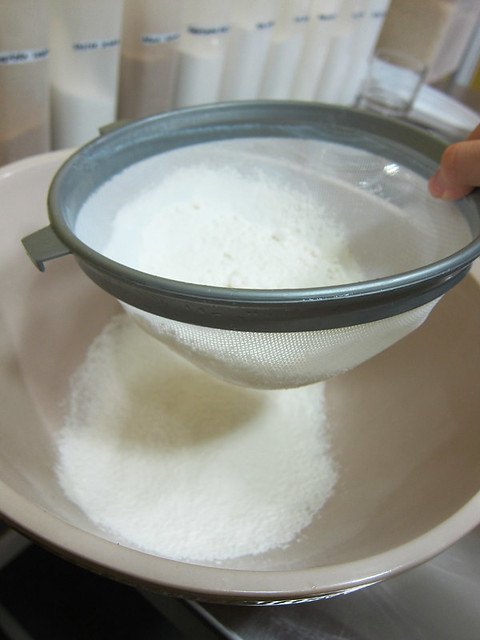
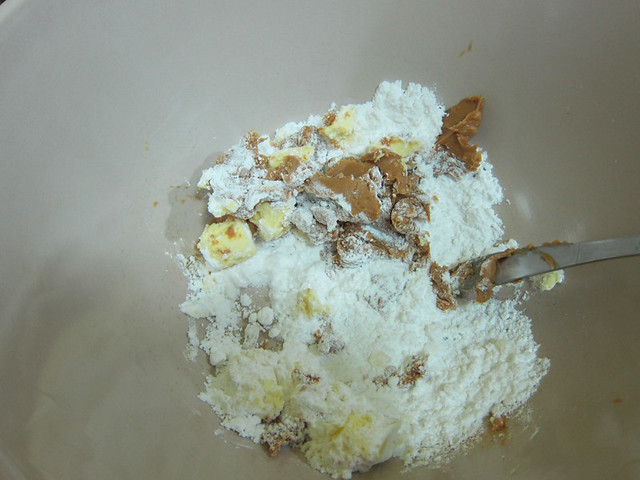
# – Sift the flour and bicarbonate of soda into a mixing bowl. Add the caster sugar too.

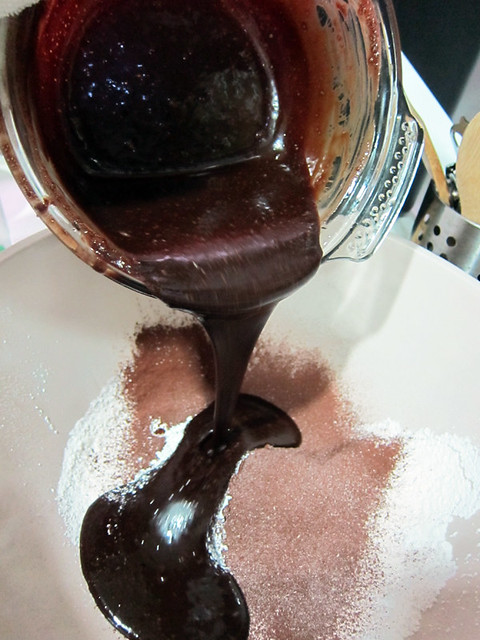
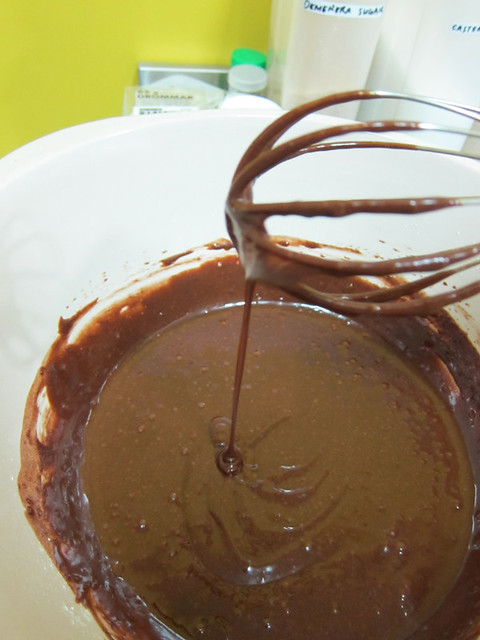
# – Now, pour the eggy yogurt mixture into the flour mixture…

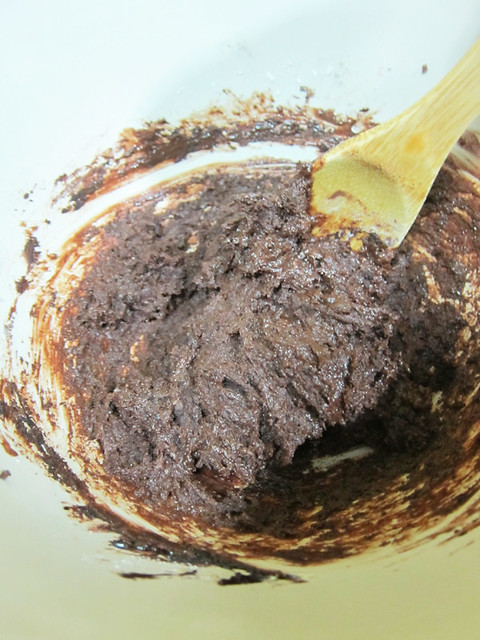
# – Followed by the beery chocolaty buttery mixture.

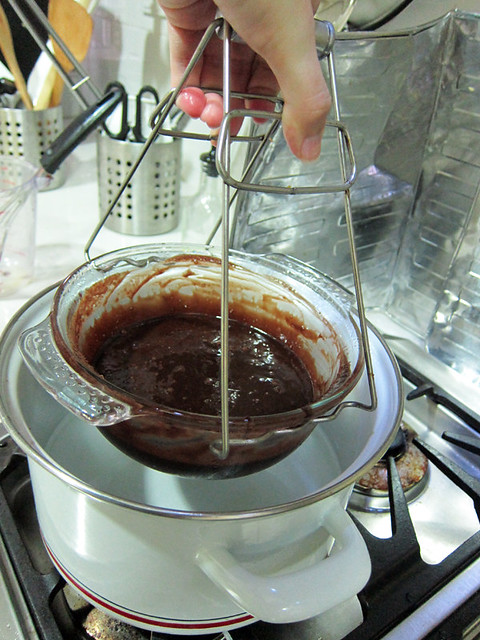
# – Whisk till everything is combined. Now, you’ve got your cake batter!

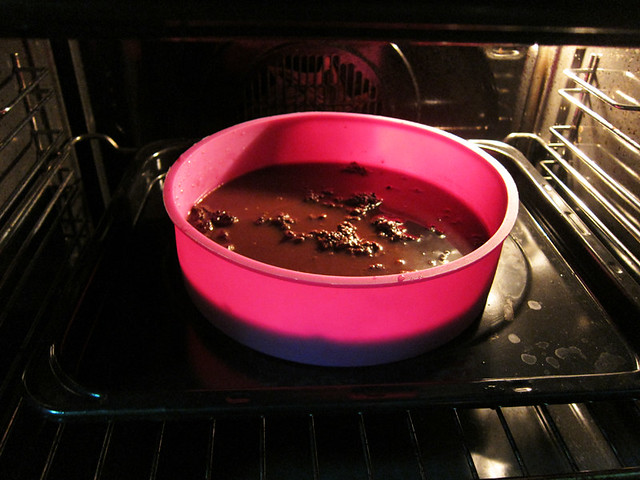
# – Donna Hay said pour into a loaf pan but because I’m such a rebel, I poured it into a round cake tin lined with parchment paper. Whatever works for you, I say. Stick it into a pre-heated oven at 160 degrees celcius for 1 hour 10 minutes or till cooked (stick a skewer into the cake and pull it out, if there’s no sticky bits means it’s done).

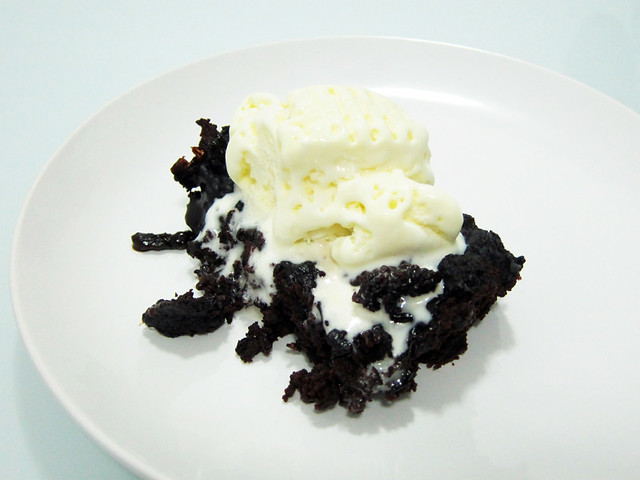
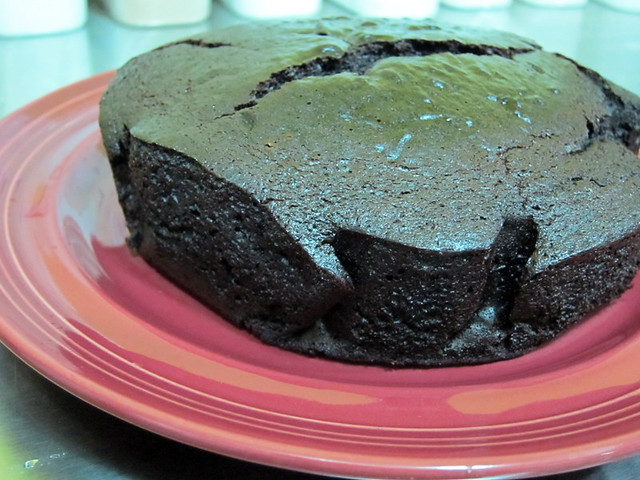
# – When the cake is done, turn it out to cool completely. I’m sorry I’ve got a cracked cake but I prefer to look at it as maximum frosting absorption!

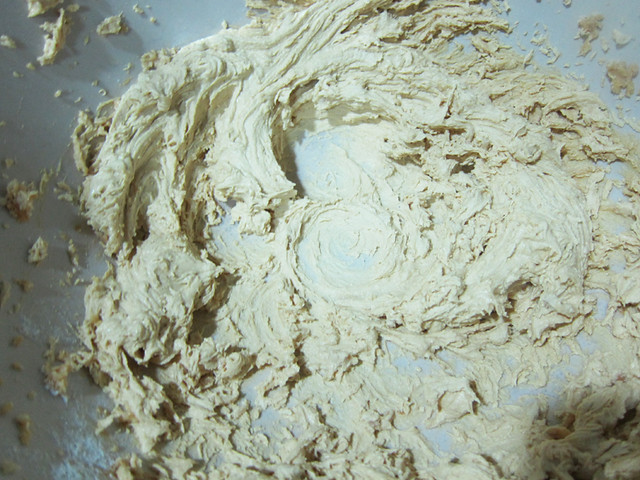
# – Now, it’s time for my favourite part. Frosting!!! Dump the icing sugar, peanut butter and butter into a mixing bowl.

# – Beat till all are combined and creamy.

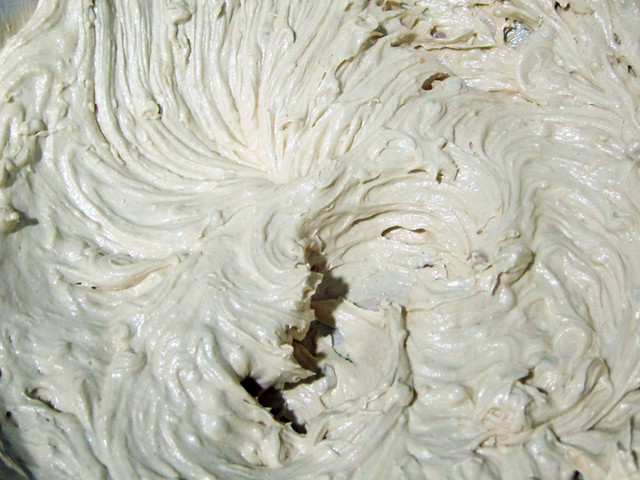
# – Then, pour in the whipping cream.

# – Beat again till it’s fluffy and creamy and yummy.

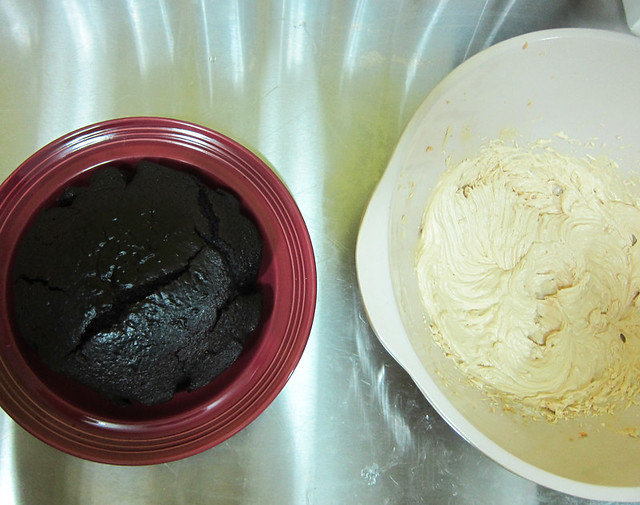
# – Set cake and frosting side by side like this. (Okay you don’t really have to do this exactly.)

# – Lay the frosting onto the cake and frost the heck out of it!

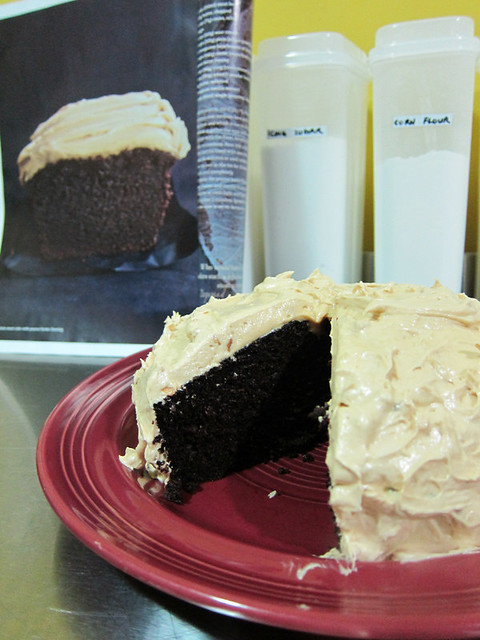
# – The chocolate, beer, yogurt and peanut butter cake A.K.A Perfection, DONE!

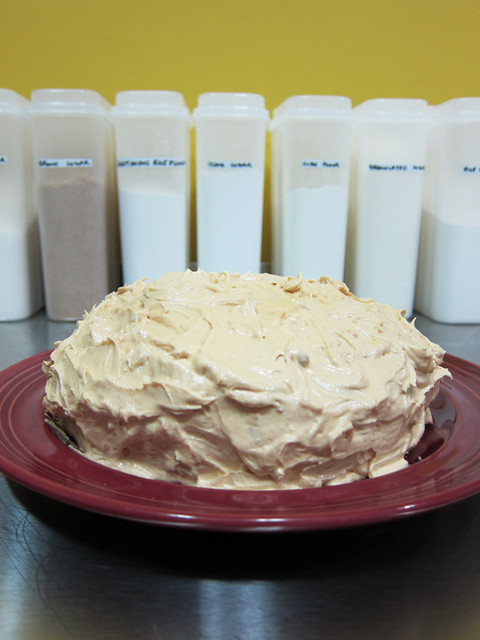
# – In the background is how the original cake is supposed to look like but I prefer mine obviously because I have more frosting, teeheehee.

I kept the cake in the fridge for about a week and it still tasted so delicious! As the BF said, “this is the kind of good that can’t be bought outside”. Make it happen!