#homecooked on #instagram

The other day, I went to check out bridesmaids dresses. Honestly I don’t really know yet what to get the girls but many months ago I saw a pink leopard print handkerchief dress which I’d love to see them wear.

My idea was met with some resistance, but hey it’s a really nice dress and not as tacky as it sounds. Promise!!!!

Anyway, instead of finding more bridesmaid dresses, I stumbled upon a wedding dress. Nothing like what I wanted initially but gawddamn I love it.

I put it on and fell in love. Fit me like a glove, no need alteration. G took a photo and wanted to Instagram it but I said no, cause in my heart I was afraid I was going to buy it and everyone would see it even before wedding day T_T

I haven’t even started looking at wedding dresses and I have already found the one. This is crazy.

Against my Bridezilla compulsion, I told the girl I’d return with my Mom and that she must keep the dress for me.

Truth is, I’m only going to go back after I lost a few kilos to try it on again because I am probably at my heaviest now (can’t be sure, cause too afraid to weight myself).

Also, G has seen the dress and I’m kinda bummed because I wanted to surprise him on our wedding day and make him gasp and his eyes welled up from my sheer beauty, that sort of thing.

So, I’m looking at the picture of me in the dress that G took every single hoping I will grow sick of it and eventually hate it. So far, it’s not working.

Anyway, I’ve been cooking a lot (which explains the weight gain).

# – Chocolate torte. Almost flourless….rich & luxurious.

# – Steak, creamy mash and peas.

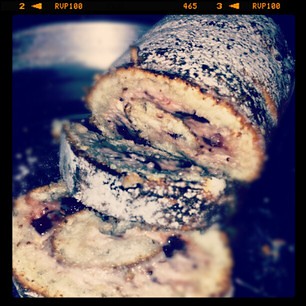
# – Strawberry yogurt roulade for Mother’s Day dessert.

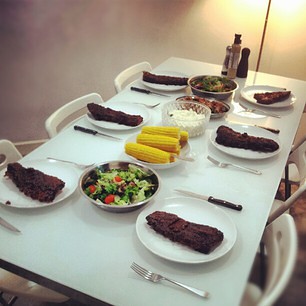
# – Also cooked sticky baby back ribs for 6 on Mother’s Day. Also mash potatoes, bacon wrapped asparagus, steamed corn on cob and salad.

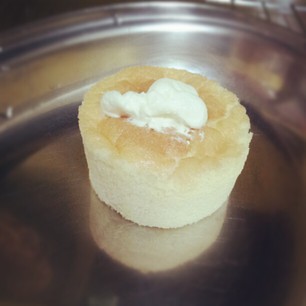
# – Made Hokkaido Chiffon Cake for the first time. Quite easy and very tasty!

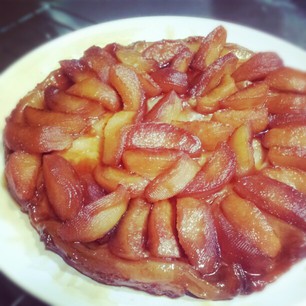
# – Apple tarte tatin. Made this right after publicly declared I was going on a diet. Sigh.

# – Just made this today. Traditional teocheow snack…chwee kueh. Super easy to make, which is bad cause that means I will make it all the time T_T

Follow me on instagram ok. My nick is “Kimberlycun”. I don’t just post pictures of food la. I’m not that boring. I post pictures of dogs too.

How I made an awesome 3D horse head light.

This is the only picture I have of our old wall light for our staircase landing. Got it from a shop in Damansara Uptown, Petaling Jaya. It is now no more.

# – Old wall lamp for our staircase landing.

Less than a year after installing the light, it literally fell apart from the inside. The starters disintegrated upon touch, making it impossible to replace the lamps.

It was the most expensive light we paid for, yet it’s the shittiest one argh!

Had to get my electrician to come in to fix the starters and all. Then few weeks later, the lamp cover fell off from its base and died into a million pieces. FOL.

Yeap, it fell off from the wall, in the middle of the freaking night…we thought we were being burglarised. Stupid piece of shit!

The insides still work (because we got the electrician to come fix it remember?) so all that’s missing is a cover.

I wasn’t keen on buying a completely new light because I’d have to bring in the electrician again so we left it alone. Until I stumbled upon a picture of a horse head on a wall.

Talk about a lightbulb moment!

The next day, I bought some steel wire from the neighbourhood hardware store and craft tissue from CzipLee.

I also got a bag of tapioca flour…intrigued?

# – First, I measured the diameter of the existing lamp base that’s attached on the wall. Then I shaped a frame according to the measurement.

# – The I started building a shape from the frame. Gradually, it became this. The view from the side.

# – View from back. I was basing the shape on a picture of a horse head I printed off Google.

# – As I didn’t bother buying a craft plier, I was using a bigass lineman’s plier which made my wire joints a little less elegant.

Now it’s time to make glue…with tapioca! I felt like I was back in primary school, woohoo!

# – (1) Put 2 tablespoons of tapioca flour in a small cup. (2) Add 6 tablespoons of water. (3) Mix until no lumps and resemble milk.

# – (4) Pour 400 ml of boiling water into a bowl. (5) Pour the milky mixture into hot water while stirring. It will start thickening. (6) Add 5 tablespoons of salt and stir until dissolve. (7) Tapioca glue, DONE! Make sure it’s neither too thick (add water) or too watery (add milky mixture). Glossy and sticky is the best.

# – Use a paint brush to liberally apply tapioca glue onto sections of craft tissue and cover the metal wire frame. You don’t have to be precise because it’s very forgiving. I didn’t even use scissors to cut the tissue into sections, just tore it off. If you got tears or holes, just add more tissue!

# – Cover every part except the back of the structure. Then leave to dry overnight.

# – When completely dried, hang it over the base of the lamp.

# – Then, turn on the lights :D

# – Horse head light, DONE!

So what do you think? Personally, I LOVE IT! Suddenly, this has become my favourite part of the house! Hehehe.