How to change dive regulator stock mouthpiece to customised mouthpiece.

The most common complaint of using a rented dive regulator is that it’s truly UNCOMFORTABLE. I came back from my 1st leisure dive trip with 2 massive ulcers on the inside of my lower jaw and a dull ache that lasted for 1.5 weeks. I had to eat my meals dolphin style and I don’t mean it in a cute sort of way.

So when I finally got my very own dive regulator, the first thing I did was to change the stock mouthpiece to a customised mouthpiece. When I first heard of “customised mouthpiece”, I thought it would involve visiting some expert mouthpiece sculptor who would charge an arm and leg.

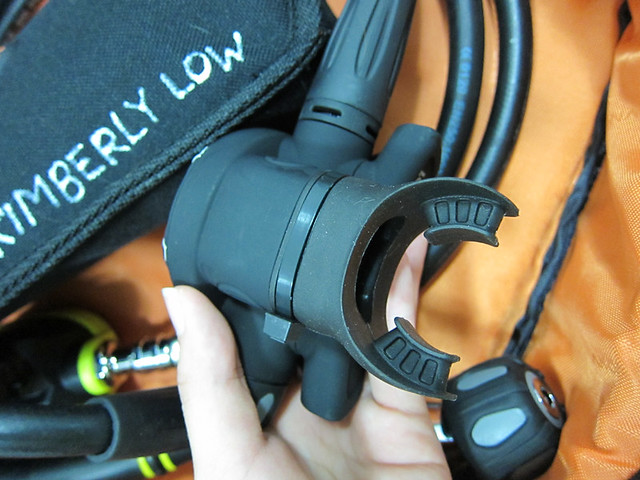
# – My dive regulator with the stock mouthpiece. It’s so tiny and I could easily pull it out of my mouth even when I bite down hard.

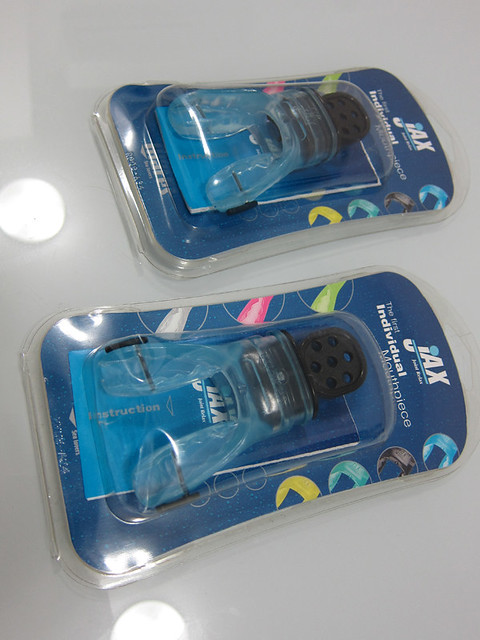
It’s not like that. Far from it! In fact, customised mouth pieces are widely available in dive shops. You can customise the mouthpiece right in the comfort of your own home. The one we got is JAX Individual Mouthpiece from Mares.

# – Personalised Mares JAX Individual Mouthpiece. Selling between RM90-RM150 each depending on which shop you go to and how friendly you are with the owner. It’s available in various colours…becauce divers are fashionable people too!

So how do you change your dive regulator’s stock mouthpiece to a customised mouthpiece? It’s easy!

The most daunting part for me was actually cutting the cable tie that wrapped around the stock mouthpiece but my fears were really unfounded. You do need a really sharp knife though.

# – Carefully cut off the cable tie around the stock mouthpiece with a sharp knife.

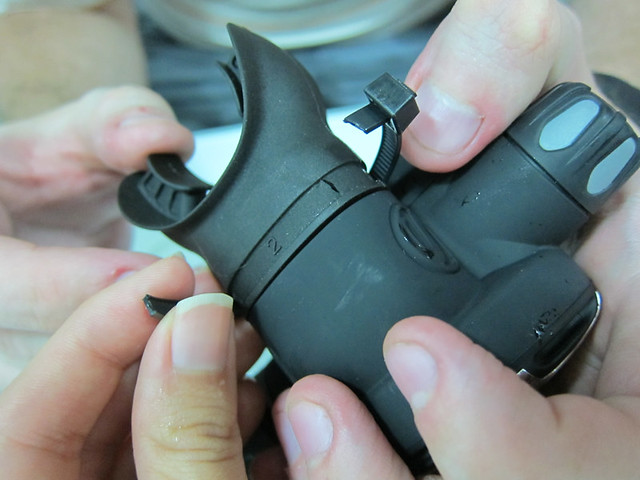
# – Then, slowly pull the stock mouthpiece off the regulator. Set your regulator aside while you continue with personalising your mouthpiece.

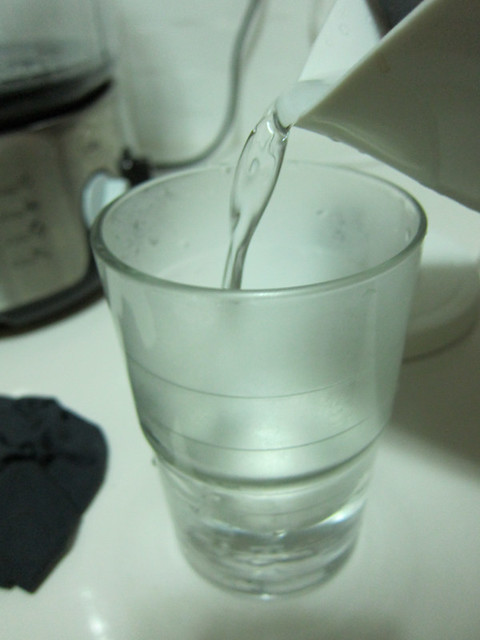
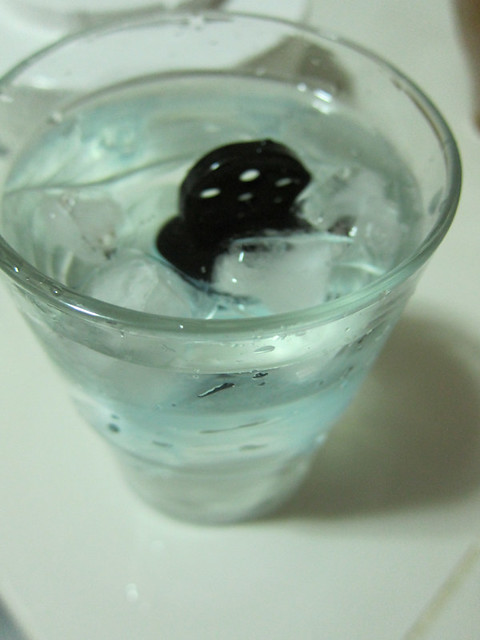
# – Pour boiling hot water into a glass.

# – Dip the customisable mouthpiece into the hot water making sure only the area where your teeth rest is submerged. Leave it for 15 seconds.

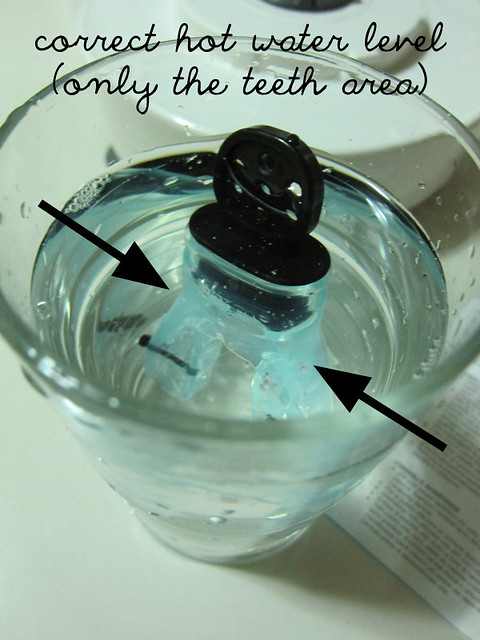
DO NOT submerge the entire mouthpiece in!

# – After 15 seconds, take it out of the hot water and shake excess water off.

# – Ensuring that the word “up” on the mouthpiece is facing well…up, put it in your mouth immediately and bite down, hard and firm. Make sure your teeth are resting in the groove of the mouthpiece. Inhale any air and suck in any water through your mouth while doing this. Also, remember to massage the mouthpiece from the outside of your cheeks as it might protrude and cut the inside of your cheeks. Do this for 2 minutes.

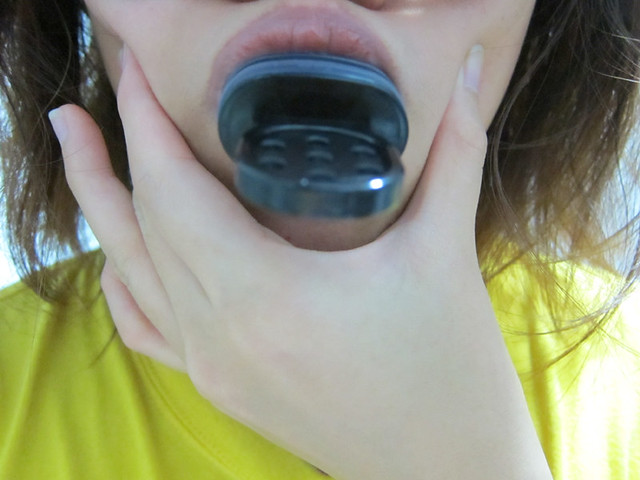
DO NOT remove any of the black component from the mouthpiece as they help to prevent incidences of irreversible misshaping (read: biting through).

# – Remove mouthpiece from your mouth and submerge the entire mouthpiece into ice cold water for 3 minutes. Then, remove the black components from the mouthpiece and bite it again to test. If it still doesn’t feel right, repeat steps from “dipping mouthpiece in hot water” onwards till you’re absolutely comfortable with it.

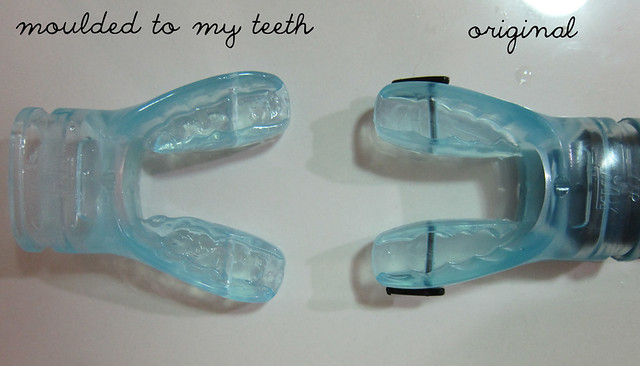
# – Check out the difference between a customised mouthpiece and its original state.

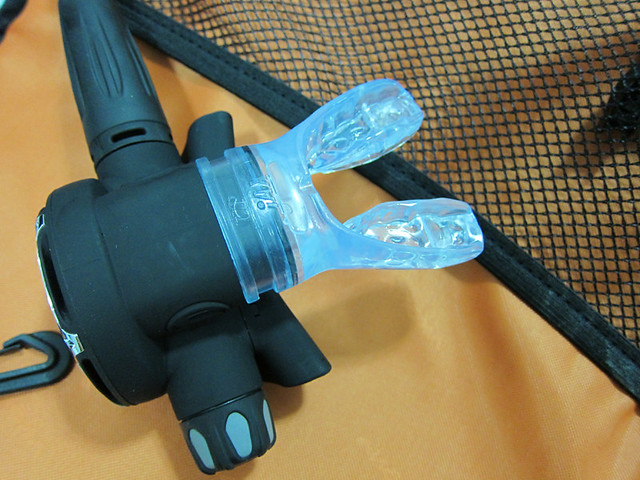
# – Now, slowly put the customised mouthpiece back onto the regulator. Depending on brands of regulator, this may take some elbow grease. Again, make sure the word “up” on the mouthpiece is facing the right direction on your regulator.

# – Success!

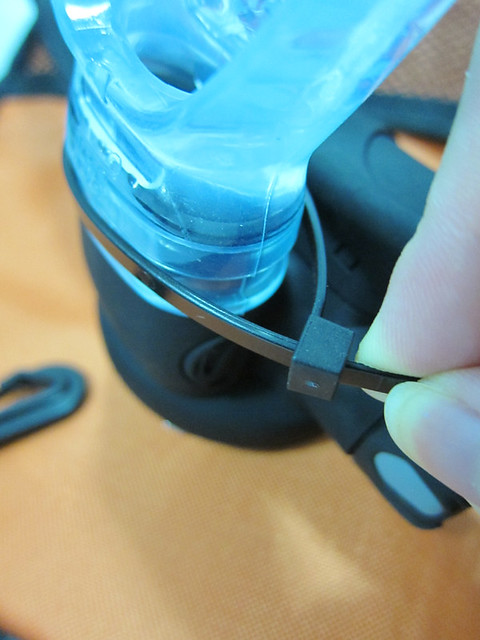
# – With the cable tie provided, secure the new mouthpiece to your regulator. Make sure where the cable tie joins does not obstruct your face in anyway.

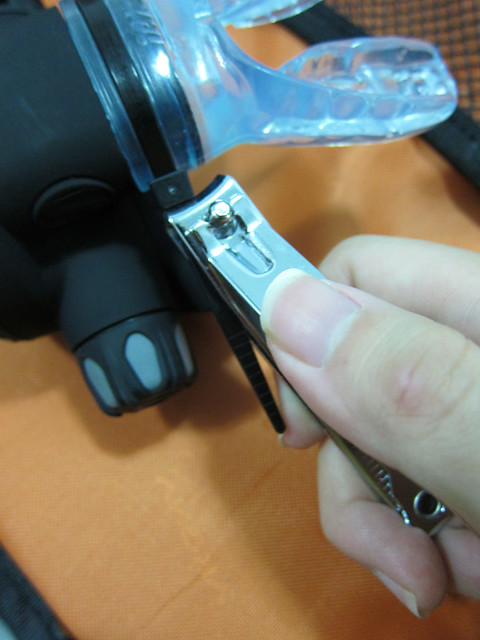
# – Cut off the excess cable tie with a nail clipper or a scissors. Some people like to file down the excess with an emery board.

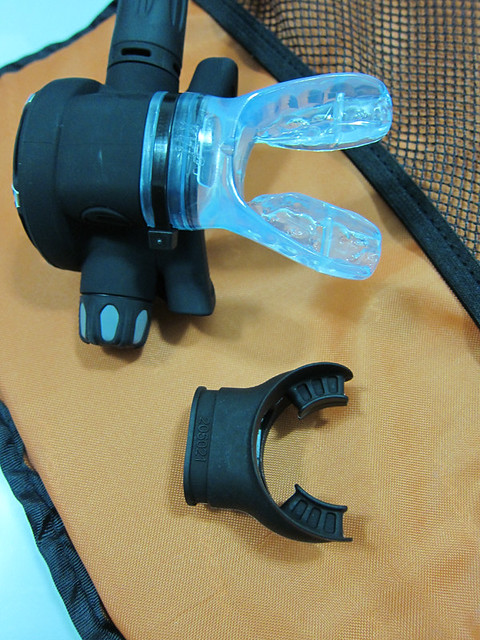
# – Done! See the difference between the stock mouthpiece and the customised mouthpiece.

And that is how you change a dive regulator stock mouthpiece to a customised, personalised mouthpiece. I can’t wait to breathe underwater with it!

My man made scones! Here’s the recipe :)

We had a sudden craving for cream tea last night. Okay, actually only the BF did, but he successfully performed “sconeception”.

I was a little hesitant at first due to the sheer numbers of calories involved but when the man offered to make the scones from scratch, I was sold.

# – Scones with jam and cream.

Making scones may involve simple & basic ingredients, but if not careful might end up with hard lumps reminiscent of paper weights. Which is why I’m so impressed by the man for it’s his first time making scones and they were absolutely DELICIOUS!

The ingredients:

  • 350g flour, plus more for dusting
  • 2 teaspoons of baking powder
  • 85g of salted butter , cut into cubes
  • 3 tablespoons of caster sugar
  • 175ml of milk
  • 1 teaspoon of vanilla extract
  • 1 tablespoon of lemon juice
  • 1 egg, beaten (for glazing)
  • # – Before you start making the scones, first pop the milk into a microwave or warm it in a saucepan. The idea is to get it just warmed through, not boiling.

    # – Then, add a tablespoon of lemon juice to the milk.

    # – Followed by a teaspoon of vanilla extract. Set the milk aside while you work on making the scones.

    # – ALSO, remember to pop your empty baking tray into the oven at 220 degrees celcius to heat up.

    # – Now lets begin to make the scones. Pour the flour into a mixing bowl.

    # – Then, add the baking powder.

    # – Followed by the cubed butter.

    # – Using your fingers, rubs the butter and flour together until resemble bread crumbs.

    # – Now add the sugar and stir to combine.

    # – Pour the milk prepared earlier quickly into the mixture.

    # – With a knife or pastry cutter, quickly work the mixture until it forms a loose dough.

    # – Tip the dough into a floured surface.

    # – With your hands, gently knead the mixture, becareful not to overwork it. Then pat it down to flatten it, forming a sheet about 4 cm thick (or thicker if you like tall scones).

    # – With a round cutter (5-6cm), cut the dough and place onto the baking tray which has been heated. If you don’t have a round cutter, you can always improvise with a cup or something :)

    # – Brush the surface with beaten egg.

    # – Stick it in the oven at 220 degrees celcius for 10 minutes or until golden brown.

    # – Delicious scones, DONE!

    # – Cut scones into half and serve with good quality jam and cream (just beat whipping cream until stiff). Better to serve with clotted cream but it’s so expensive here! :(

    # – This is really what happened after the nicer pictures are taken. SCONE GORGEFEST!!!!!

    Easy to make and taste truly delicious. Crispy on the outside, light and soft in the middle. Just remember not to overwork the dough and you’ll be fine :D

    Mishmash of things.

    I’ve started watching this show called Bionic Vet on BBC Lifestyle. The show is mind-blowing!!! It features the amazing work of vet Noel Fitzpatrick.

    Actually, calling Noel Fitzpatrick a vet is somewhat an understatement. While the average vet would recommend putting pets to sleep for seemingly difficult but curable ailments, Fitzpatrick never goes down that road. He’s a real life HERO!

    (Fan girl alert :P)

    I wish there were expertise as high level as his in Malaysia or even somewhere nearer like Singapore. I envy pet owners who live nearby to his practice, which is located in Surrey, England. Must be comforting to know that there’s someone so dedicated and brilliant and passionate around to turn to IF your beloved pet should encounter any issue.

    The BF said it might not be a very good show for me to watch though, because when I do, I bawl like crazy. Dogs are so amazing, they can be in excruciating pain (which is so hard to watch) but their face light up (hello, waterworks) the instance their owners call out their names :(

    Alright sorry, I know I’m so channeling dog lady right now. Can’t help myself. Speaking of dogs, I attended the prize-giving ceremony for Purina ONE Picture of Health about 2 weeks ago.

    Bad news, I didn’t win. Good news, there were so many ADORABLE DOGS!

    # – This labrador was super duper well-behaved.

    # – Me and camera-shy Charlie. So effing hard to take a picture of him still T_T

    Congratulations to the winners! We need more contests for dog owners hehehe.

    On another note, this morning I appeared on NTV7 The Breakfast Show with Pete and Fixaa, founders of Reach Out. I was there to talk about my experience distributing food to the homeless.

    I was glad to share, though I was freaking out inside (stage fright). Naz and Aishah Sinclair, the hosts were very nice, which helped in alleviating my nerves.

    By the way, the in-house stylist gave me newscaster hair. I loved it!

    # – Volume, baby.

    After that, I called my mom (who proudly announced on her Facebook profile that she’s watched me on the tele) to ask her how I did on national television. She’s like, “Hmmm, your top made you looked a bit big la”.

    I know right? T_T

    But all is forgiven, cause she and Dad dropped by my house just now bearing a large container of braised pork <3 Before I end this post, here's a picture of Charlie's head on my crotch.

    Caption it?

    P/S: Psyching myself to blog about food soon. If it helps, you can check out my previous recipes ALL HERE! Sorry for the intermittence :(