This is probably one of the most boring blog posts I’ve ever written. Okay, maybe not as boring as the fillers but stairs? Who has an entire blog post dedicated to a flight of stairs? :P
Well, remember the state of our stairs before renovation?
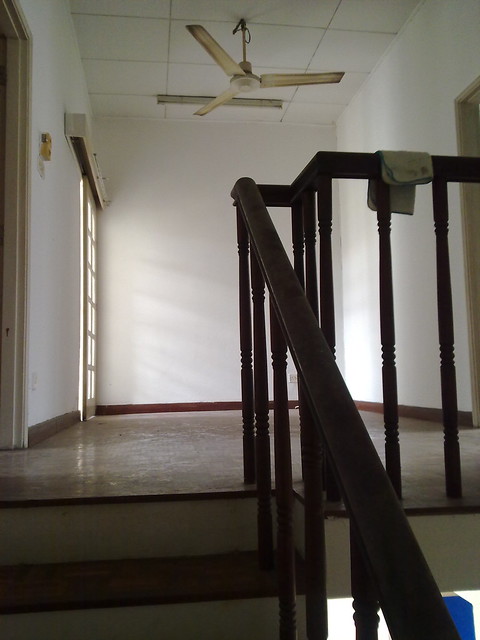
The railings were weak from old age and compounded by termite damage, were pretty unsafe to be used. Here are some old pictures to jostle your memory:
BEFORE
# – Kampung style.
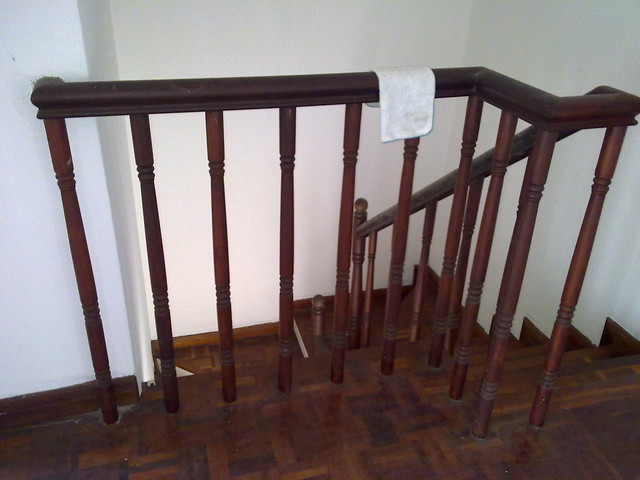
# – Don’t use the railings or this might probably be your last view before falling over and die.
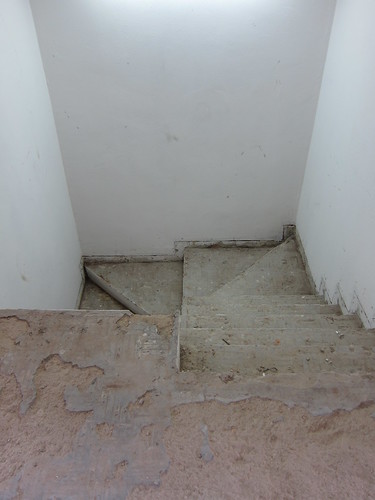
DEMOLITION
When the railings and floorings were finally ripped out, we breathed a sigh of relief.
# – All gone!
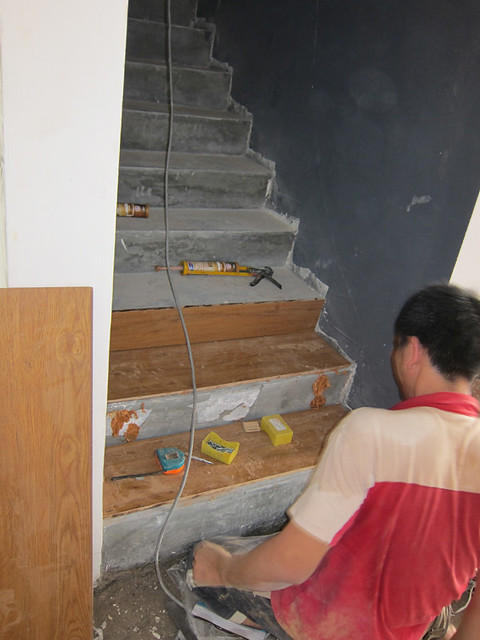
DURING
# – Installing the treads. The flooring contractor gave us a little heart attack because they were covering up the risers as well when we had informed them not to. If you looked closely, you can see some nasty glue stain on the riser because we were making them removed all the flooring :P
Well, while writing this post I found myself stumped because I had no idea how to describe the different parts of a staircase. So I did some googling and discovered this very useful illustration:
# – Now you know why I know how to use the words “tread” and “riser” :P
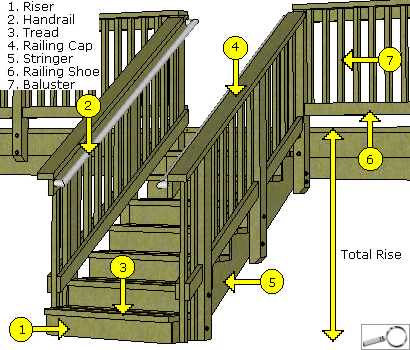
SOURCE
It took us forever to decide on a railing design. We wanted something timeless, easy to clean and sturdy. We finally found something we liked on Google Images and showed it to our contractor.
He actually made some improvements on the design we gave him. For instance, he made the circular base and baluster (refer to illustration above) into a single piece. Some people cover the baluster base with screwed on caps which might get loose in the long run so I’m really thankful that my contractor had thought ahead for us :)
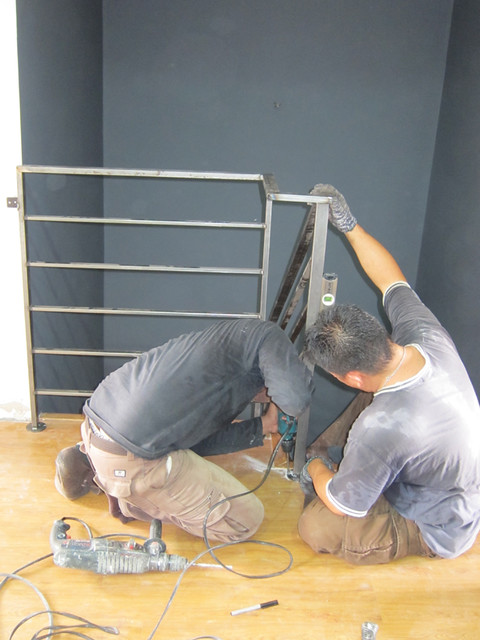
# – Positioning the railings before the painting. Notice the baluster with circular base on the left of the picture?
NOW
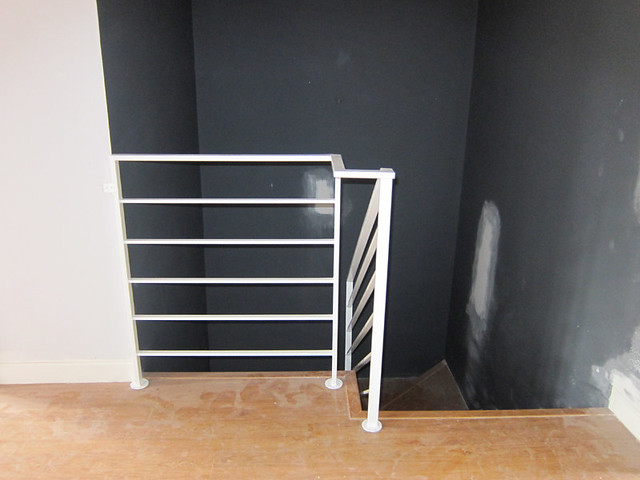
And now after a paint job, the railings are finally installed!
# – Our staircase.
# – Our staircase. Again.
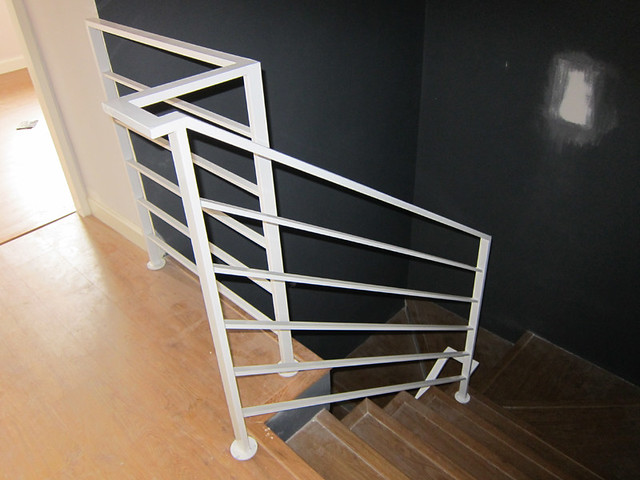
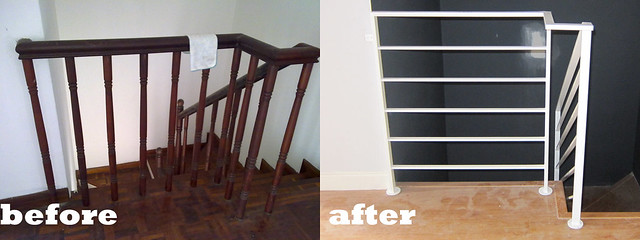
The transformation is quite drastic and I’m very, very happy with the final results :)
# – Before and After.
So there, an entire blog post about my stairs. Happy renovating!
It will take me ages till i blog such boring blog post like this aiks =( i wan my own hauz too!!
Mm I like the stairs, but I’m not sure if I like having a circular base. Probably cos I’m used to seeing sunken balusters wtf. yay i learnt a few new words wtf.
ah.. boring post?? actually I learn a lot from this post today.. ^_^
Thank you.. :D
what happened to the uncovered risers ?
i still have no idea what a baluster is wtf. but i love your renovation posts :D
how much $ just for that?
Thank you for this post, def helps in renovating stairs :P
Kim,
yeah..just curious…what happened to the uncovered risers? also…just my 2 cents…wondering if the gaps between the ballusters are small enough as not to have charlie put his head thru and can’t get out……
cheers…
no idea what you just wrote. BUT I LOVE IT
joshua: as long as u put ur mind to it, it’s happen one! hope to see your reno posts soon!
yeehou: i know what you mean, i grew up with sunken balusters too hehe
cathj: thanks for dropping by :)
genova: oh, since my risers are concrete, i just got them to skim them smooth and paint them the wall colours for a more seamless look.
aud: thanks bb mwahs
ahsiang: actually i’m not sure, the railings are part of the house’s entire grill cost and the covering for treads is part of the cost for entire upstairs flooring. if i have to make a conservative estimate, probably between 4k – 5k.
jessie: no problem :)
vincent: pls refer to my answer to genova on the uncovered riser. ooh actually i’ve never thought of that but the gaps on my railings are big enough for adult head to pass through. that said, i think parents who are renovating stairs should keep that in mind for the safety of their children! thanks :)
suanie: thanks suan!
Vincent: Good point, but not an issue – cos Charlie aint allowed upstairs :D
Hey, this is the opposite of boring, lah!
Err.. are you gonna do something with the stairwell walls? Me, I think I’d like some brightness in it, maybe a pink feature wall (or a strip of bright coloour for contrast) or a big, colourful painting. Just saying…
Love your staircase!!
I’ve been reading your renovation works, why not start a renovate/decorate blog separately? ;)
Eh this post isnt boring at all, totally informative! Then again, I can’t install any stair railings in an apartment, unless I have a duplex unit :P
I’d like to correct if at all necessary. What you described as baluster is actually called a newel post. Balusters are infilling between newel posts and judging from the photos, you don’t have them. I did mine too but DIY!
Great post, btw!
suertes: haha u sound just like my mom “why the wall so dark one!!?”. we’re just gonna brighten it with a feature light ;)
looloo: thanks babe :)
kf: coz i don’t blog about it often enough lor :(
mark: thanks man. can u for the future duplex mah! :)
don: ooh thanks for the clarification! DIY? Impressive!! I wish I could DIY sometimes but it probably works out much more than hiring someone to do it here, sigh.
I like the stairs railings. Was into it when my ID proposed but the downside is when you have kids they tend to climb the horizontal railings and would be dangerous if they fall over. :/