How to grow your own decoration for Chinese New Year

Chinese New Year is coming! We, people of chinese heritage love to decorate our home during this festive season with auspicious symbols.

From red and gold banners filled with well wishes to beautiful hanging trinkets and bright lights. We love beautiful plants too and one of the most popular are kumkuat trees and pussy willows.

There is however one plant that is completely under-rated but it’s my favourite…because I can grow it easily and it looks so good!

Drumroll please….the arrowroot plant or better known as “ngahku” in cantonese.

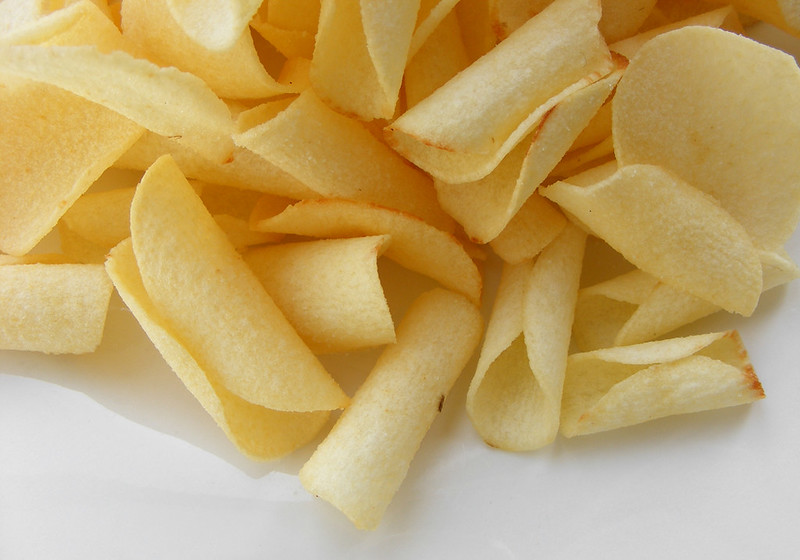
Yes, it’s the very popular arrowroot as it makes one of the best snacks during CNY – the arrowroot crisps. The salty, light and crunchy and oh so moreish “ngahku”.

# – The delicious “ngahku” crisps.

When Chinese New Year is approaching, you can often find arrowroot bulbs being sold in massive piles for really cheap at your neighbourhood supermarkets.

So if you’re making your own “ngahku” crisps, do remember to save a few bulbs for growing.

It takes about 3 weeks for the plan to mature, so plant your bulbs about 3 weeks before Chinese New Year is good.

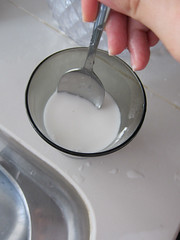
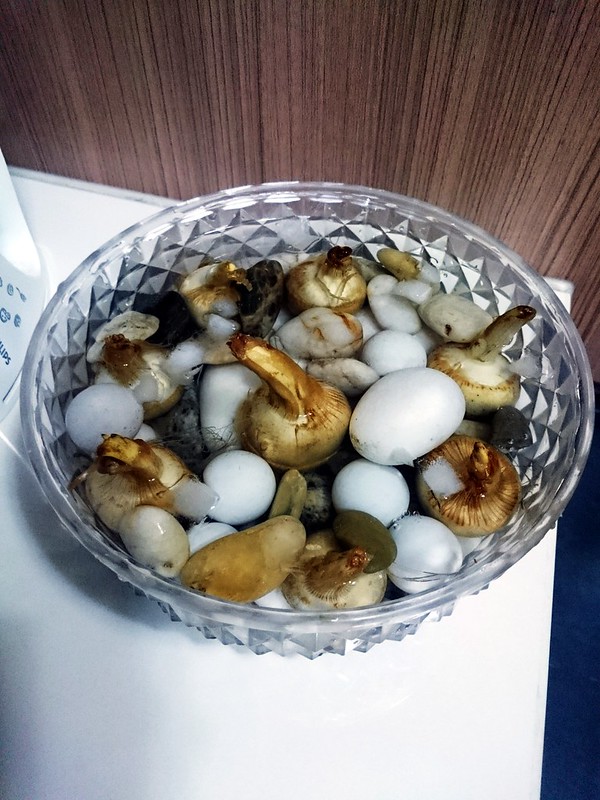
# – First, get some pebbles and arrange the bulbs in a wide, decorative bowl, like this. With the stem sticking out, fill it up with tap water.

You know what, that’s it! All you need to do now is to change the water every two days and wait :)

# – After about two weeks, the bulbs will grow roots and will start to sprout. You will find these beautiful stems growing upwards and the leaves unfurling.

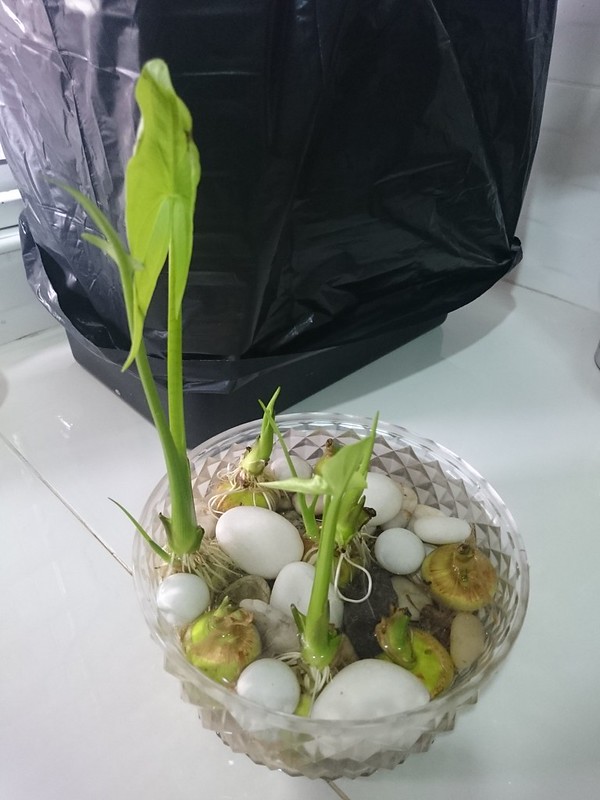
Just keep on changing the water every 2 days and maybe snip off some browned leaves (it does happen) sometimes.

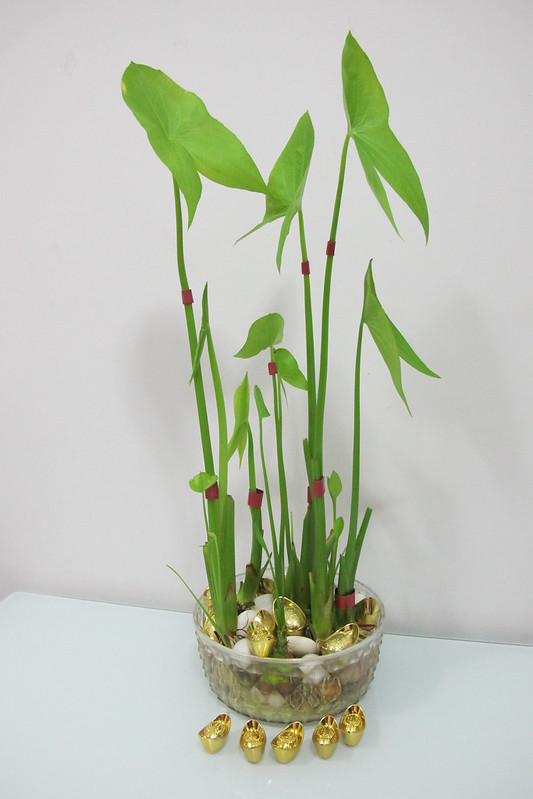
# – Before you know it (or about 3 weeks later), you will find yourself with a bowl of tall and majestic arrowroot plants. And so it’s time to decorate!

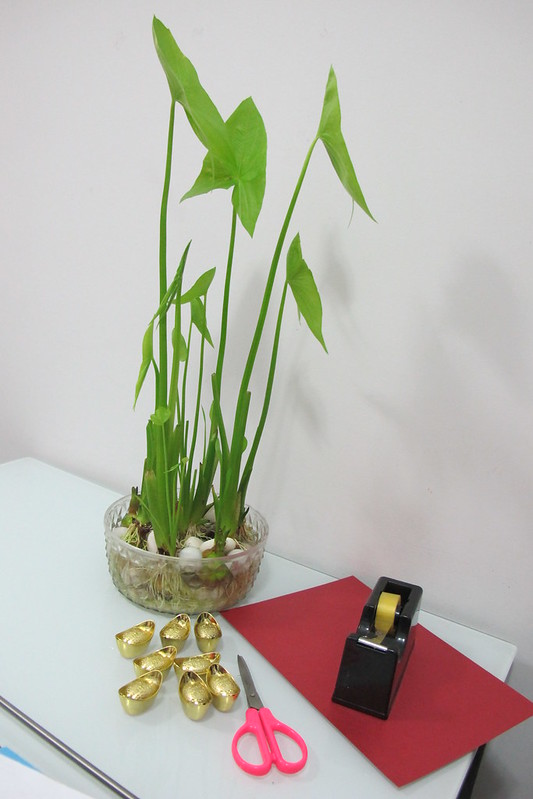
# – I like to cut red papers into strips.

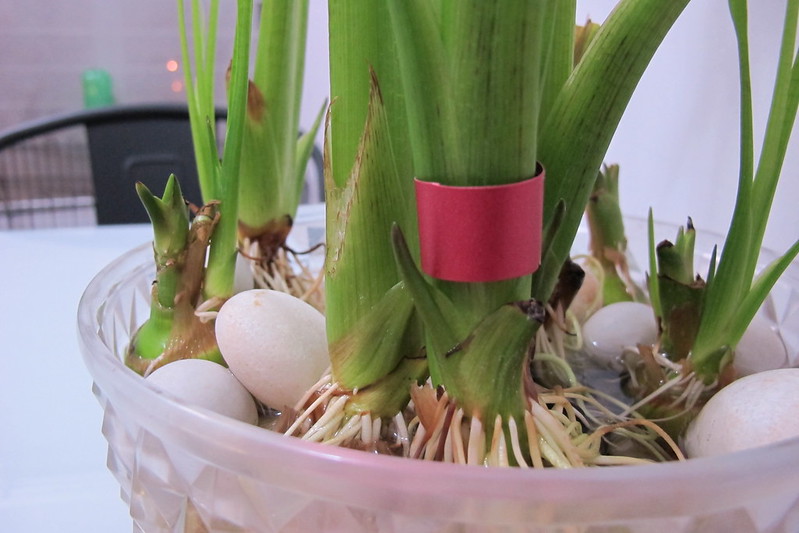
# – And wrap it around each plant. Secure with celophane tape.

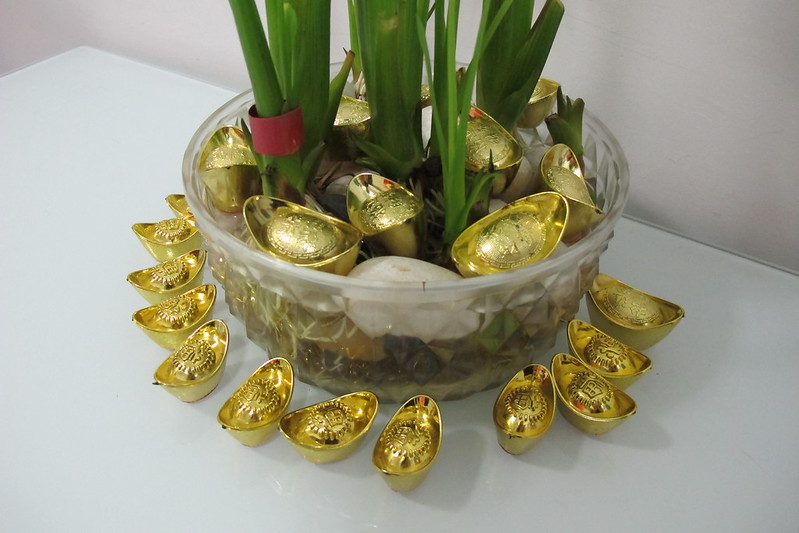
# – I also like stacking some decorative gold bullions around the plant.

# – And there, your very own auspicious and tall arrowroot plant for Chinese New Year! Huat ahhhhhhhhhh!

Happy Chinese New Year and hope you’re blessed with great health and prosperity in the year of the monkey!

Xmas is coming Ho Ho Ho

I’ll have another ad published on Monday so I decided to post these pictures of myself putting up our Xmas tree eventhough I look like crap!

# – This is me in my comfy uniform – hub’s old polo tee and football shorts.

# – Yeap, I set the camera on timer to take pictures of myself setting up the Xmas tree. So happening!

# – My tree is lopsided.

What kind of Xmas person are you? Do you buy new decorations and tree every year or are you like me – reuse everything every year?

The only new stuff I bought this year were some candy canes, cause I want to eat em.

# – Glammed up.

Most of the baubles date back to Gareth’s childhood. It quite amazing how my mum-in-law has managed to keep them in such good condition.

# – This snowman is probably older than me.

# – I don’t think this polar bear is very old, maybe 10 years old?

# – Pretty sure this one is fairly new.

# – Hats for hubs, me and Charlie!

# – Got these mini trees last year.

# – Hung some baubles on our money trees too. These baubles are old!

Only 10 days more to Xmas!! So excited!

How I made an awesome 3D horse head light.

This is the only picture I have of our old wall light for our staircase landing. Got it from a shop in Damansara Uptown, Petaling Jaya. It is now no more.

# – Old wall lamp for our staircase landing.

Less than a year after installing the light, it literally fell apart from the inside. The starters disintegrated upon touch, making it impossible to replace the lamps.

It was the most expensive light we paid for, yet it’s the shittiest one argh!

Had to get my electrician to come in to fix the starters and all. Then few weeks later, the lamp cover fell off from its base and died into a million pieces. FOL.

Yeap, it fell off from the wall, in the middle of the freaking night…we thought we were being burglarised. Stupid piece of shit!

The insides still work (because we got the electrician to come fix it remember?) so all that’s missing is a cover.

I wasn’t keen on buying a completely new light because I’d have to bring in the electrician again so we left it alone. Until I stumbled upon a picture of a horse head on a wall.

Talk about a lightbulb moment!

The next day, I bought some steel wire from the neighbourhood hardware store and craft tissue from CzipLee.

I also got a bag of tapioca flour…intrigued?

# – First, I measured the diameter of the existing lamp base that’s attached on the wall. Then I shaped a frame according to the measurement.

# – The I started building a shape from the frame. Gradually, it became this. The view from the side.

# – View from back. I was basing the shape on a picture of a horse head I printed off Google.

# – As I didn’t bother buying a craft plier, I was using a bigass lineman’s plier which made my wire joints a little less elegant.

Now it’s time to make glue…with tapioca! I felt like I was back in primary school, woohoo!

# – (1) Put 2 tablespoons of tapioca flour in a small cup. (2) Add 6 tablespoons of water. (3) Mix until no lumps and resemble milk.

# – (4) Pour 400 ml of boiling water into a bowl. (5) Pour the milky mixture into hot water while stirring. It will start thickening. (6) Add 5 tablespoons of salt and stir until dissolve. (7) Tapioca glue, DONE! Make sure it’s neither too thick (add water) or too watery (add milky mixture). Glossy and sticky is the best.

# – Use a paint brush to liberally apply tapioca glue onto sections of craft tissue and cover the metal wire frame. You don’t have to be precise because it’s very forgiving. I didn’t even use scissors to cut the tissue into sections, just tore it off. If you got tears or holes, just add more tissue!

# – Cover every part except the back of the structure. Then leave to dry overnight.

# – When completely dried, hang it over the base of the lamp.

# – Then, turn on the lights :D

# – Horse head light, DONE!

So what do you think? Personally, I LOVE IT! Suddenly, this has become my favourite part of the house! Hehehe.