love the weekends. finally some time to pamper myself. i got my lashes done yesterday, and this morning with charlie lying calmly at my feet, i even got a manicure done. i’m so productive :)
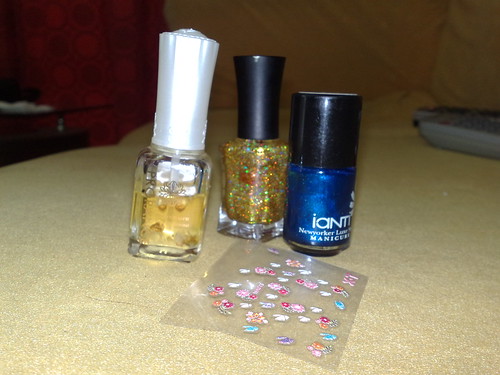
since i’m at it, i might as well post a tutorial on how i did it. you need a clear nail polish, a coloured nail polish (mine is blue), a glitter nail polish (mine is gold glitter) and nail design stickers! i’ve had the stickers for the longest time and totally forgot about them. glad i stumbled upon them while searching for my manicure kit.
#1 – what you need: clear polish, coloured polish, glittered polish and nail art stickers.
of course, before any paint job, it’s good to shape your nails into the desired shape, buff em up and get rid of the cuticles. they will ultimately make your nails look much better. that said, i’m just too lazy :P
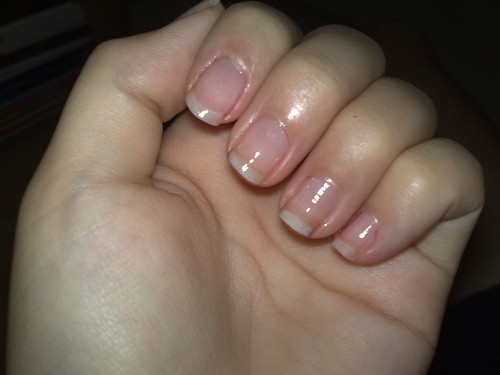
#2 – first, paint your nails with the clear polish.
#3 – then, paint french tips over your nails with the blue polish.
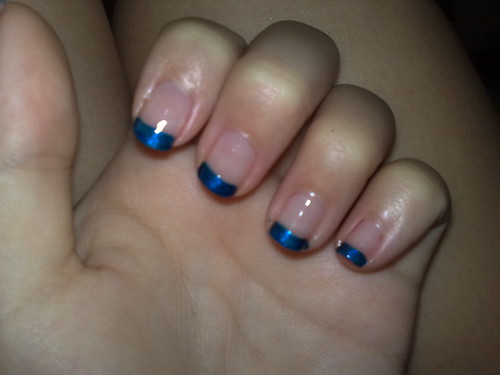
takes some practice to get every tip at similar width but you can cheat with the french tip stickers. might also get a little messy at this point, but be patient and wait till it’s all done and dry before you get rid of the excess nail polish.
#4 – now wait for your polish to completely dry before you handle the stickers. 45 minutes to 1 hour is the safest bet for cheap nail polish :D

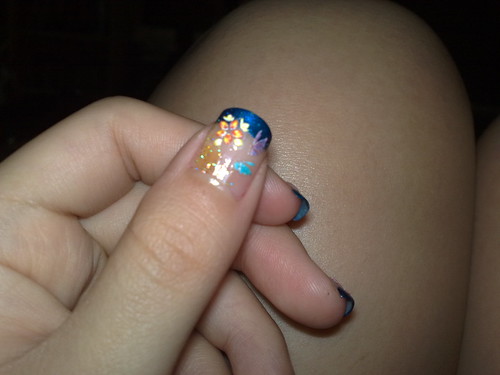
#5 – it’s better to use a tweezer to lift the stickers up cause you may chip your nail polish doing it with your finger nails. now stick them on your nails, like this.
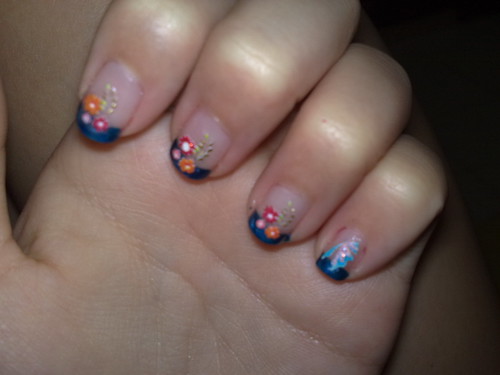
#6 – then, apply a little glitter polish over the empty area of your nail design, like this.
lastly, finish it off with a good layer of clear polish to seal off your design.
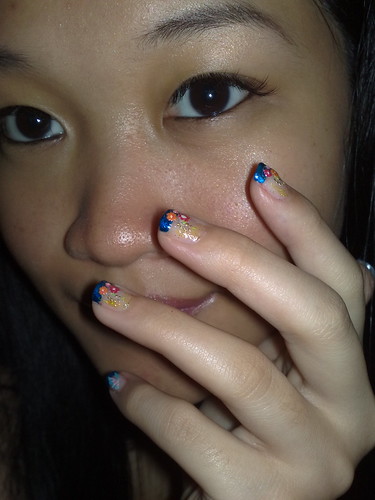
#7 – and voila, DIY nail art!
cost almost nothing. all you need is time and a wee bit of patience.
ladies, do you prefer your manicure DIY or done by a manicurist?
oh, and this picture is in response to ky’s comment. i is pr0 ok!
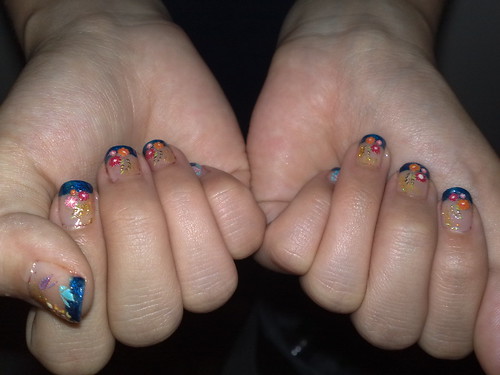
#8 – right & left hands
SOOOO PREEETTTYYY! <3 I’m waiting for my friend to be free to do my nails for me again. This time I’m going pink with white french tips, woooo!
I wanna see how the right hand looks like :P
mell: tq! pink and white wheeeeeeeeeeee
ky: picture posted! i is pr0 ok
very nice! I’d do my own pedicures, but as for manicures I’m a total KLUTZ – the left side will look great, the right side will look like some kindergarten kid’s handiwork! LOL…
Not bad, you may interested to read
https://thy-dowager.blogspot.com/
omg damn nice. how on earth did u manage to do on both hands so gorgeously.
* runs off to try *
hi, i was looking for plastic bubbles and stumbled upon an old post of yours. https://www.kimberlycun.com/2008/04/02/your-5-minutes-of-life-is-better-spent-watching-my-video/
you said you buy it from your stationary shop, are there any other places that sell them? What are there proper name? or else, i would be like pointing hand and legs trying to explain to shopowners what i really want.
amazing. do some for charlie too. the fella will appreciate it. probably get attention around the neighborhood tim
kim the reply to KY. ‘pr0 ok’ i read as PORK.. whahahahaaha.
the manicure is nice lei. how long it took u?
looks super cool! but i’ll never be able to do it on my own for my right finger nails.. plus i chipped my middle finger nail while struggling with my luggage this morning! :(
Hi, when I open posts I only wind up viewing a small part of the site’s post. I do not know if it’s my webbrowser(Google Chrome) or not, is anyone else experiencing this problem?
Wow, the results are awesome! Normally at first glance I wouldn’t be attracted to the design of the nail stickers, but you managed to complement the nail polish with it well.
Looks great! :D